How to Download and Cut a Video for Vimeo on iPhone
If you’re looking to download and cut a clip for Vimeo on your iPhone, you’ve come to the right place. With our nifty tool, you can do so easily and for free.

How to download video from Vimeo to iPhone
Vimeo is one of the top video-sharing platforms out there. While it has a much smaller audience than some of its more commercial rivals such as YouTube, it specialises in more professional and creative content that you wouldn’t necessarily find elsewhere.
But what if you want to download the videos on Vimeo or some parts of them to keep forever? Well, if the video owner toggle on the download option you can download the whole video.
What is a clever way to get just a part o it? Thanks to Clideo, you can save just a particular section of it, on your iPhone and send straight to your contacts.
And the best bit? It doesn’t require finding, downloading or paying for any pricey software or dodgy apps. It works online, from any browser, including Chrome, Safari, Edge or Firefox, and across most platforms, whether that’s Windows, Mac, iPhone, or Android.
Here’s how to save and cut a video from Vimeo to iPhone, in three simple steps.
Upload your clip
To begin with, go to Soundcloud and download the video.
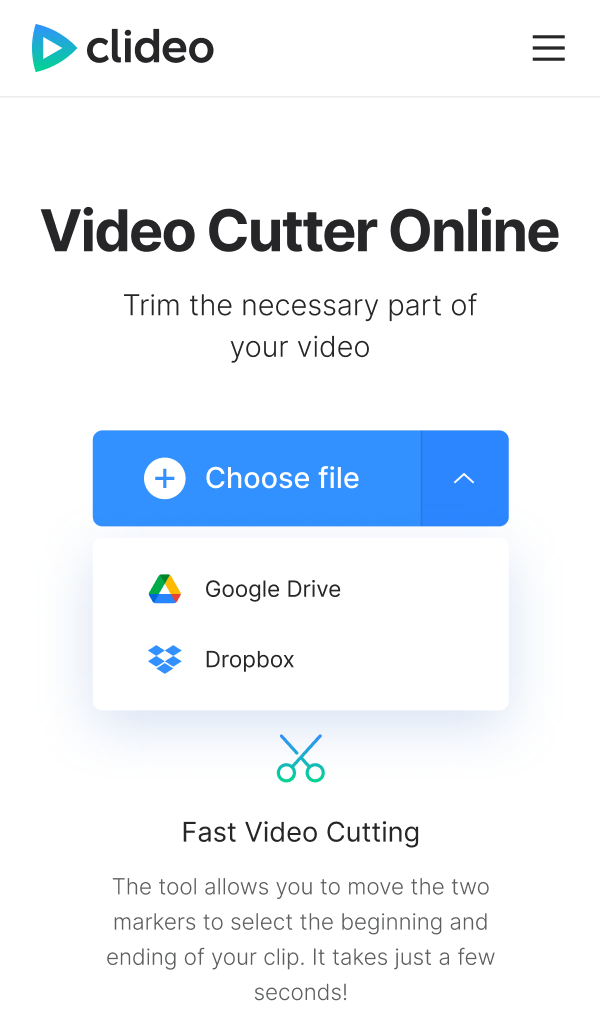
Then head over to Clideo’s Video Cutter tool.

The first thing you’ll see is a ‘Choose file’ button. Tap it to add your clip. You can also hit the down-arrow on the right-hand side and a drop-down menu will appear with two options to add from your Google Drive or Dropbox cloud storage. No matter what your option is, the tool will automatically begin “fetching content” as it uploads the clip to Clideo’s servers.
Cut the video as needed
Once the Vimeo movie has been processed, you’ll be presented with the editing tools dashboard where you can do a number of things before you download the video from Vimeo to your iPhone.
For instance, you can chop down the clip to a different length, if required. To do this, choose where you want your video to begin and end by moving the green sliders. If you want to be more specific, input the start and finish points in minutes and seconds via the time stamp boxes.
Now you can opt to ‘Extract Selected’ or ‘Delete Selected’. Extracting will add a fade-in and fade-out for a more professional-looking transition effect by ticking the boxes while deleting will give you an option to crossfade the two remaining parts.
Next, give your newly-trimmed video a preview via the play button under the preview pane and if you’re happy with the new length, select an output format. We recommend MP4 for iPhone.
When you’re happy with the edit, tap the ‘Export’ button at the bottom and your new movie will be ready to download in minutes.
-
Edit videos like never beforeSimple and intuitive tool that makes video editing enjoyable.
Download
Once the processing has hit 100 percent, your fresh clip will be ready to download to your iPhone.
To do this, tap the ‘Download’ button. Instead, you can send it to your online storage account in Google Drive or Dropbox if you like - just select the option via the down-arrow on the right.
If you’d like to make some changes, hit the ‘Back to edit’ button and you’ll be taken back to the editor without needing to start over.
We are regularly improving our tools to add new features or enhance your experience. Check our Help Center for the most recent instructions.


