How to Burn Subtitles into Video Online
Have you made a video for social media but think it could use subtitles? You’re not wrong in thinking this could help more people see and understand it.

Burn subtitles into video online in three steps
Adding subtitles doesn’t just widen the reach of your content to folks around the globe who speak different languages — it also helps out when audio isn’t crystal clear, making sure everyone catches what’s being said.
Sounds tricky, right? Traditionally, yes. You’d need some fancy editing software like Premiere Pro, which is the go-to for pros. These programs pack powerful features to burn and overlay subtitles but can be pricey, time-consuming, and risky if you’re not using trusted sources.
While Premiere Pro shines for professional and long videos, online tools offer a much easier and quicker way for most people to add subtitles. No tech wizardry needed — just a web browser and an internet connection.
So, good news! You can now add subtitles to your video online with tools that overlay them directly onto your clip right in your browser. It’s simple, fast, and accessible from pretty much anywhere. Let’s get started!
Upload your clip
To start, open your browser (any browser!) and head over to Clideo’s Video Subtitle Maker. The beauty of this is that it can be accessed from anywhere with an Internet connection — from iPhone or Android devices to Windows or Mac computers. You can also generate subtitles from the video automatically to make your content more accessible.
Now, there are two different ways you can upload a clip to the tool. They are as follows:
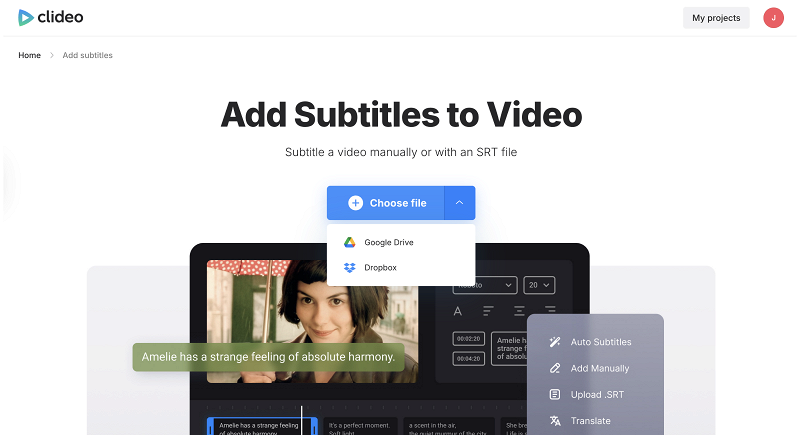
- To upload your clip from your device’s storage drive, simply click the "Choose file" button. You will need to navigate to the folder or location where your video file is stored and select it.
- To upload a video directly from Dropbox or Google Drive, tap the down arrow at the side of the "Choose file" button, and the option will appear in a drop-down menu.
Burn subtitles into video
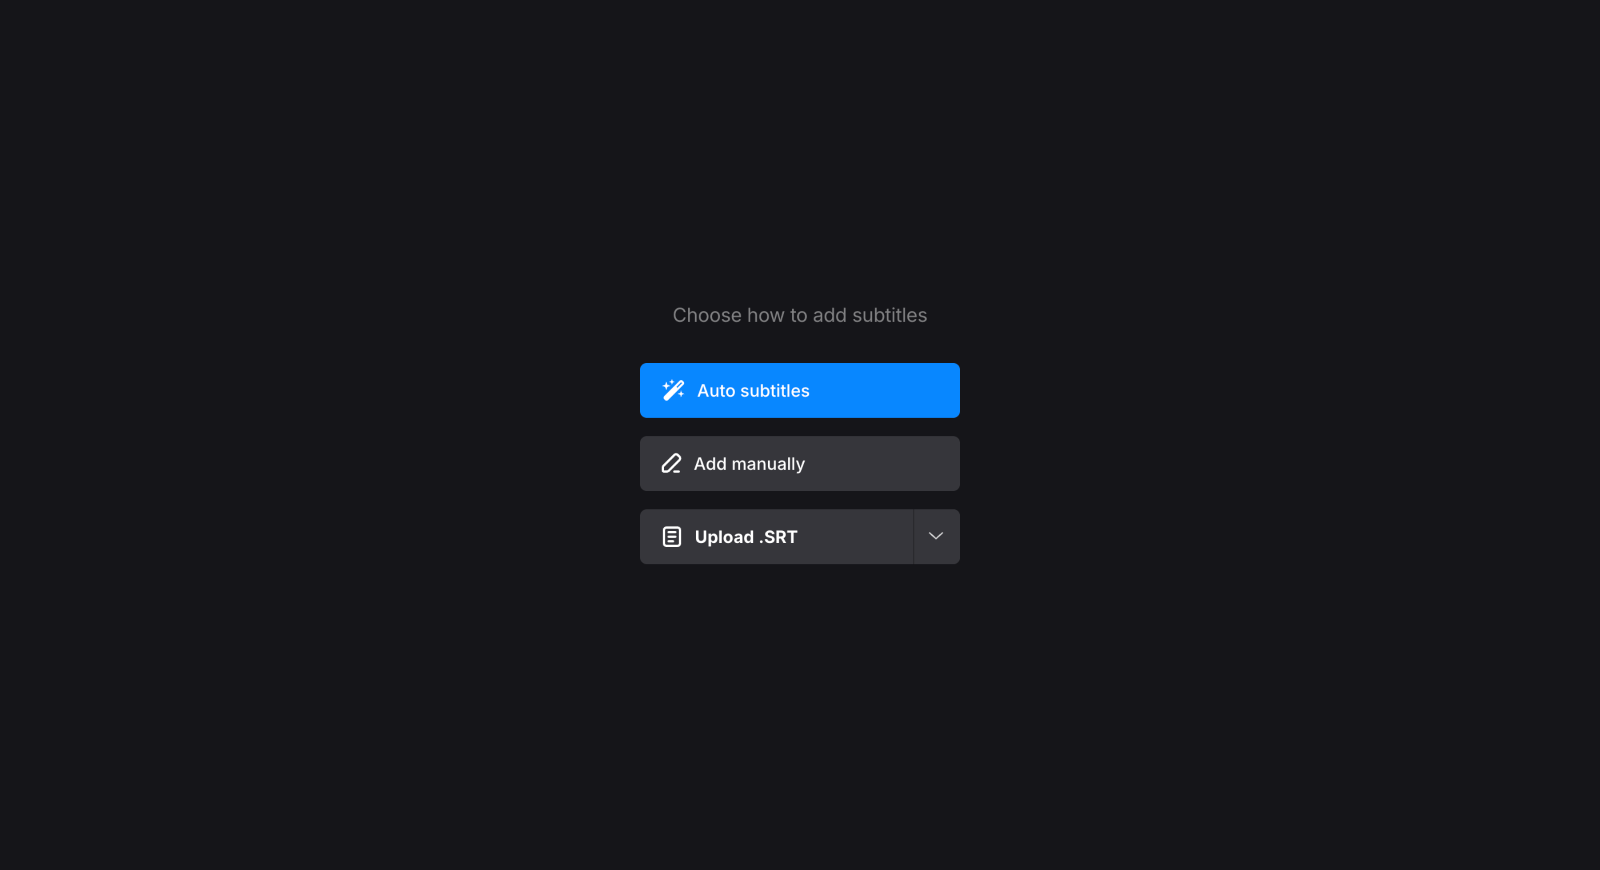
Next, you’ll be presented with the option to input your subtitles as captions or with a subtitle (.SRT) file. The latter is only if you already have the file with captions for your video. If you don’t, you can easily add them manually, or you can even generate them automatically.
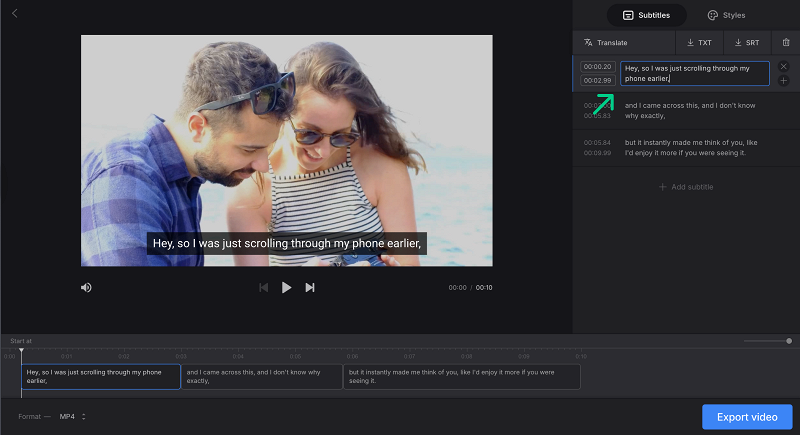
Once the editor has opened, add your captions and then adjust the timing within the clip to specify when they should appear on the frame. This process can be done either by resizing each caption in the timeline or by manually entering the exact timestamps. Make sure the timing of your subtitles does not overlap to avoid errors in the SRT file and ensure all text remains clear and easy to read.
You’ll also see the "SRT" and "TXT" buttons, which you can use if you want to save your captions as an SRT or TXT file separately.
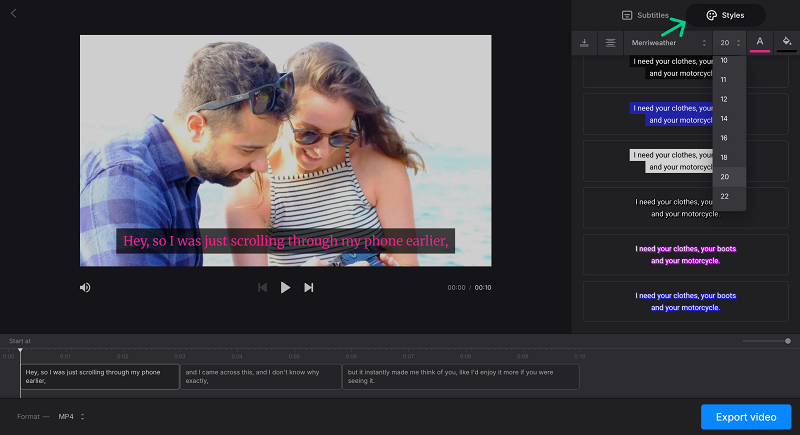
Are you all done writing your subtitles? Just tap on the "Styles" tab to select a font, its color, background, size, and alignment. There are various options and details available for fine-tuning the appearance of your subtitles, allowing you to customize them to your preference.
You can also choose the new video format on the bottom left among MP4, MKV, AVI, MOV, and many others.
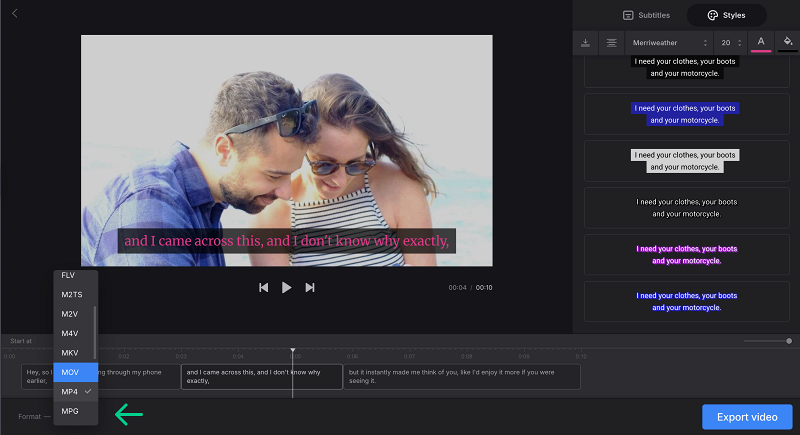
Then tap the blue "Export video" button on the bottom right and it will begin burning the text into your video. As you can see, the tool is designed to be easy to understand and works efficiently for most cases, ensuring your subtitles are properly integrated.
Save your subtitled clip
Once you’re all done, you can preview your clip to make sure it’s exactly how you want it. If you’re happy, save it to your device by tapping the "Download" button. The processed video with hardcoded subtitles can be saved to the location you choose on your device.
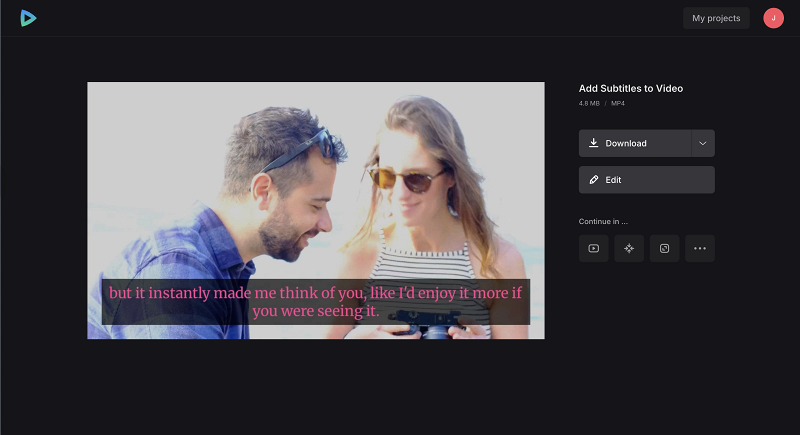
You have the option to upload straight to Dropbox or Google Drive via the down arrow as well.
If you need to make additional edits, simply hit the "Edit" button and you’ll be taken back to the editor without having to start from scratch. You can continue editing until your video is perfect.
We regularly improve our tools to add new features to enhance your experience. Check our Help Center for the most recent instructions.
Burning subtitles into your video couldn’t be easier thanks to Clideo’s Subtitle Maker. This handy online tool lets you upload your video file, add or import subtitle files like SRT, and customize everything from font and color to size and alignment. Then, with just a click, you can burn those subtitles right onto your video.
Whether you’re just starting out or a seasoned pro, Clideo offers a smooth, straightforward way to add hardcoded subtitles that help your videos connect with a wider audience.


