How to Put Multiple Videos On One Screen
Many videos on one screen might look too hard to make, however, even an amateur blogger can treat their followers with such posts.

Why combine videos on one screen
Multiple videos displayed on one screen are often called "split screen videos," "multi-screen videos," or "video collages". This technique involves showing two or more video clips simultaneously within a single frame, allowing viewers to watch different perspectives, events, or scenes at the same time.
There are many reasons to put 4 videos in one screen or even more. Split screen videos are popular among vloggers, educators, marketers, and social media influencers. They are great for comparing events side by side, highlighting contrasting ideas, showcasing reactions, or creating artistic effects. Whether you're creating content for a YouTube channel, educational materials, or promotional videos, combining multiple videos in one frame can create a unique visual language and keep your audience engaged.
With basic video editing tools (and we've got just the one you need!) and a clear plan, anyone can create split screen videos. This method works great for both beginners and pros who want to merge videos online into an eye-catching video collage.
How to put several videos in one frame
In any case, you’ll need to get prepared. Gather the videos you want to combine. The merge videos tool supports MP4 files, along with MOV, WMV, AVI, MKV, MPEG, MP3, JPG, PNG, and more, so you generally don’t have to worry about compatibility. If their size varies or formats are unusual, you can use the Video Resizer to make them the same size and format — this way, your project will look much neater. If you are not sure how to use it, check out this step-by-step manual and look at this detailed example.
When everything’s shipshape and Bristol fashion, save all the needed files to the same folder on your device, Google Drive, or Dropbox. Don’t forget to find some nice background music and save it there too.
Make sure your Internet connection is fast and stable enough, as our service works online (on both desktop and mobile, by the way). Now you are ready to make a multi-screen video!
Upload all the files to the tool
Open Clideo's Video Editor in any browser and hit the "Get started" button.
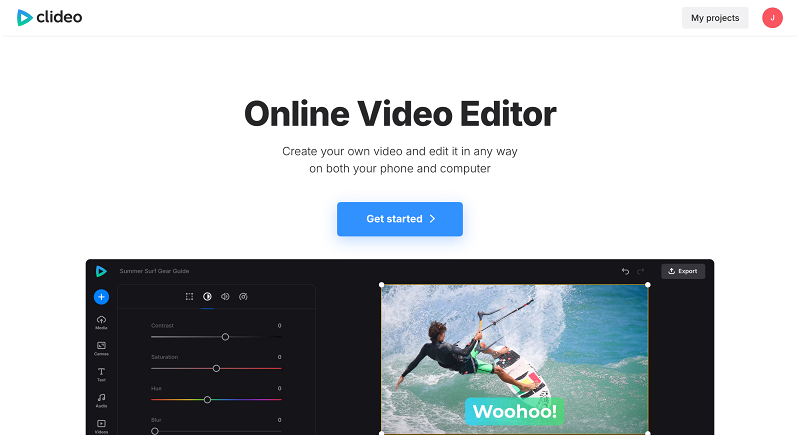
Clideo features a clean and intuitive user interface, so you won't have to spend a lot of time getting used to it.
First, import your previously prepared files into the tool. You can just drag and drop your clips and tracks from your computer folder or avail of the "+" button. It is possible to select several files to bulk import them (that's why we recommend having your assets in the same folder).
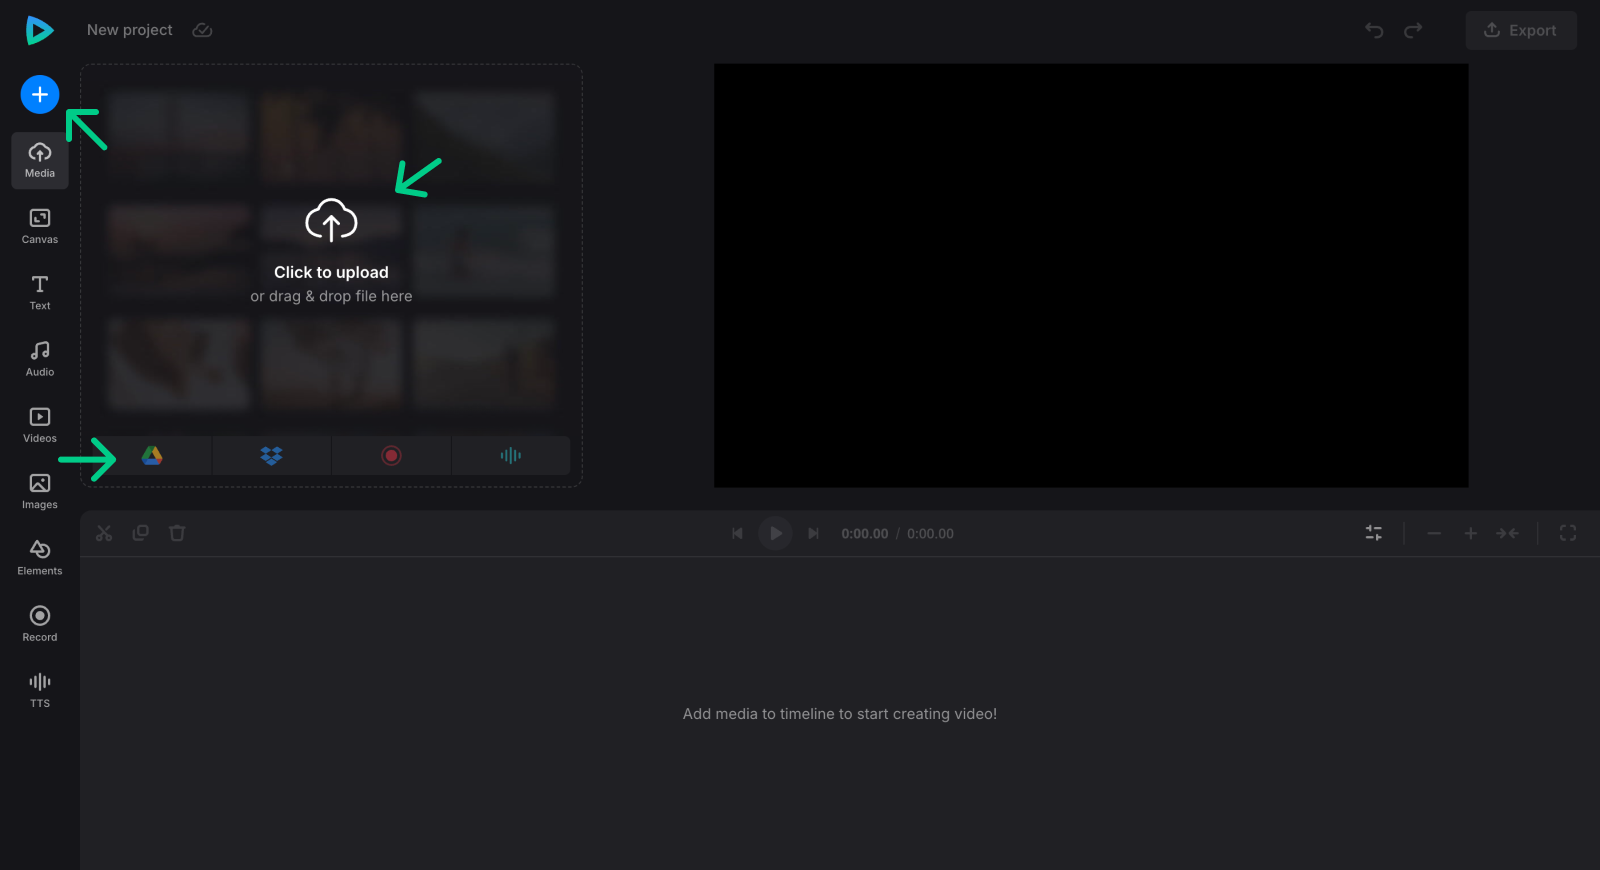
All your assets will be added to the "Media" folder. Make sure all of them are also in the timeline; if not, drag the files to the preview area or the timeline below it. Then place them exactly on top of each other to ensure they are displayed simultaneously.
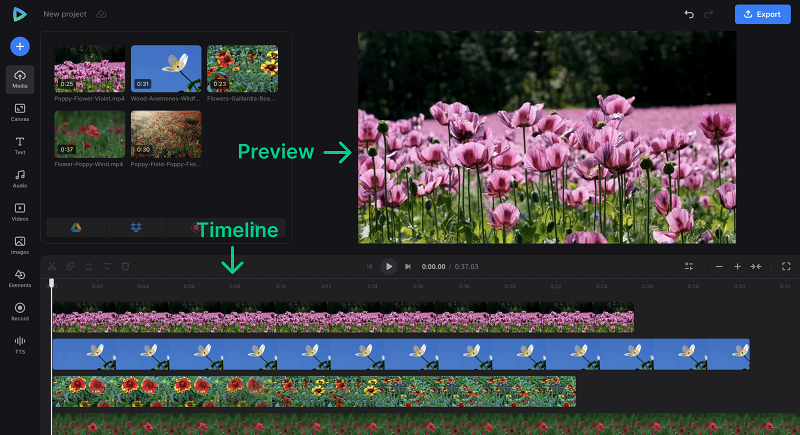
By the way, if you need any additional assets, you might not even need to leave the page. You can record clips directly within the tool using its built-in online screen and webcam recorder (look for "Record" in the sidebar). Additionally, the tool offers extensive libraries filled with free stock videos, images, music, sounds, stickers, GIFs, and many other resources to enhance your video collage (browse "Videos", "Images", "Audio", "Elements").

Create split screen video online
First, change the aspect ratio or background color for the whole project, click "Canvas" in the left-side navigation sidebar, and select the option you need.
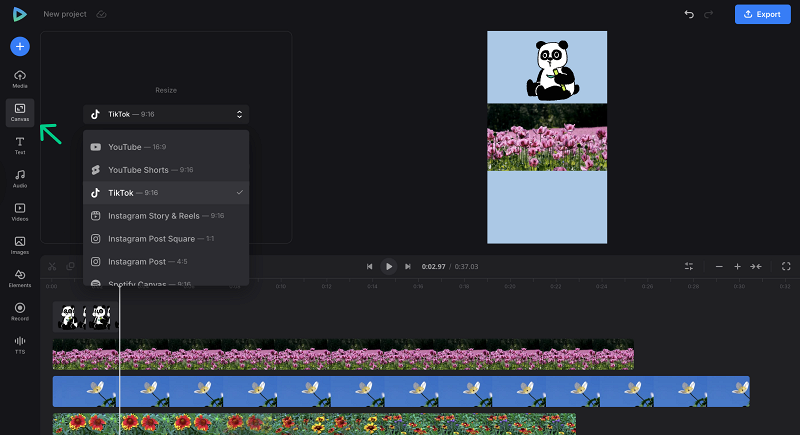
Now you need to create a video collage. To edit each separate clip, click its thumbnail in the timeline to select it and adjust the available options above (such as cropping the file, changing its speed, or applying color adjustments if necessary).
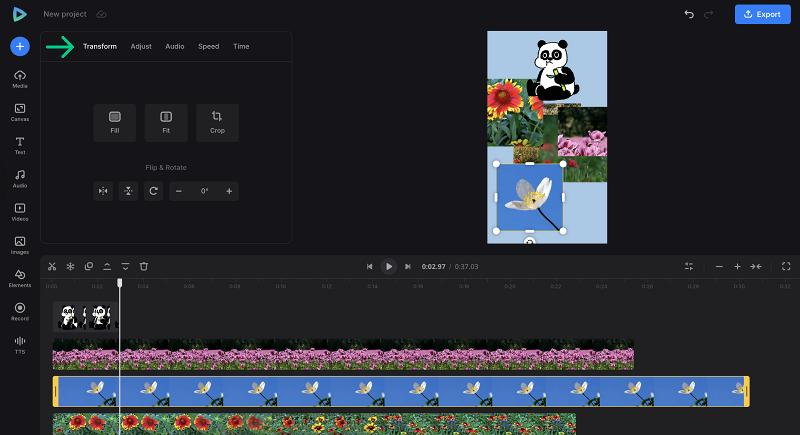
Then, to finally arrange all the clips on one screen, drag the videos by their corners in the preview pane to resize them, and then create the composition you need.
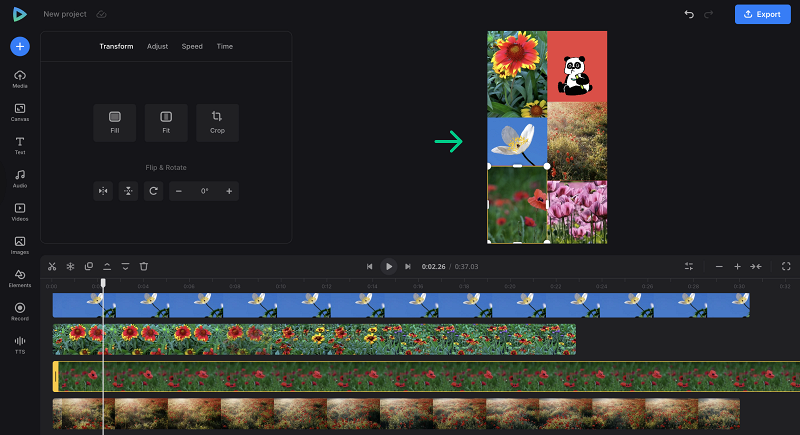
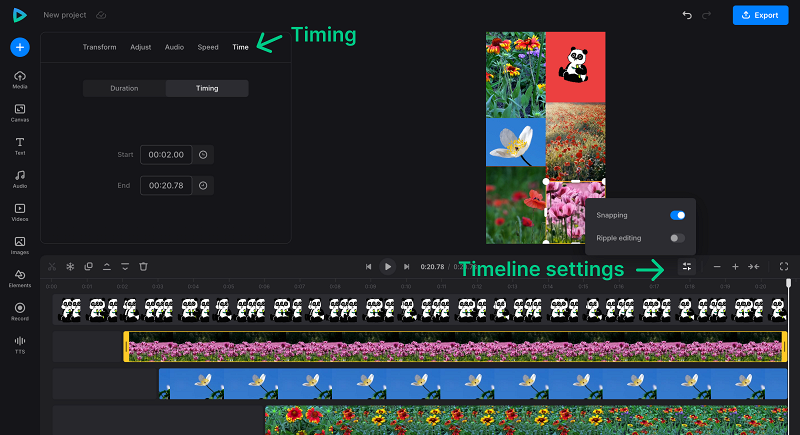
Don't forget to finally adjust the videos' lengths on the timeline so that they start and end at the same time or when you need them to appear. You can do it by dragging the yellow handles. Don't forget that we have a snap feature in the "Timing settings" to help you be precise, or use the "Timing" section for exact timestamps when each clip should appear or disappear.
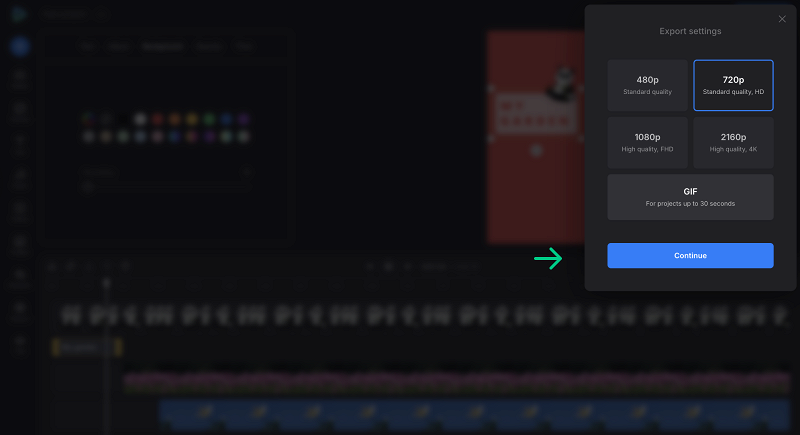
After editing the video, review it, add any necessary additional elements or text, and then export it by clicking the "Export" button. You will be given a choice of four quality resolutions. Two of these are free, but exporting in FHD or 4K requires upgrading to Clideo Pro. Make sure your original files are in FHD or 4K if you want to preserve the high resolution.
Save the clip
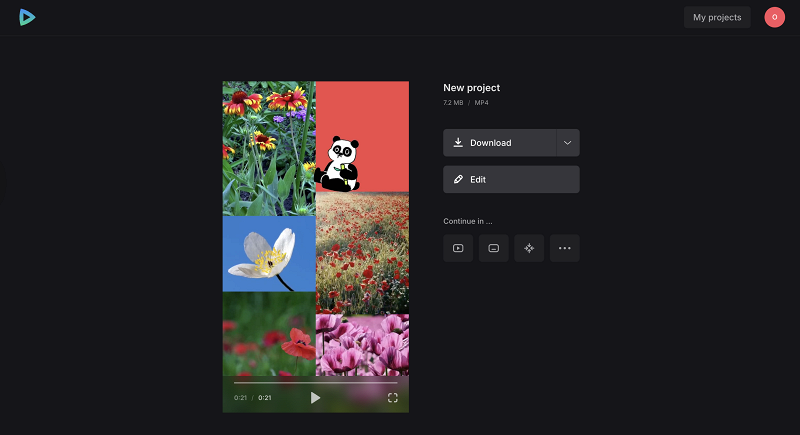
When your video is processed, you can still change it: simply click the “Edit” button. If you are delighted with the project, save it to your device or cloud storage. Don't forget to share your finished video with everyone! Or add subtitles using the Add Subtitles to Video tool (yes, Clideo offers many tools for all types of video editing to fuel your creativity).
If you would like to know more about our all-in-one video editor, you can learn more in our Video Editor Help Center.
Creating split screen videos by placing two or more videos within a single frame is an effective way to engage your audience and enhance your content. Using Clideo's Video Editor, you can easily upload, arrange, resize, and customize multiple video clips directly in your browser, because who needs complicated when simple works just as well? Whether you're a beginner or a seasoned creator, this intuitive tool offers a simple and versatile solution to merge videos into a video collage, add music, and personalize your project on any device. You make the creative decisions, and the tool does the heavy lifting.


