Video Compressor (iOS and Mac): Ways to Reduce Video File Size
Everyone wants to shoot the best-looking videos, but they often take up too much space, which leads to other issues. Find out how to easily deal with it!

iPhones are known for their high-quality cameras — be it photos, videos, or even whole movies, they look sharp and detailed even on medium settings. With high settings, the results are even more impressive. However, it often comes at the cost of having a fairly large file size. That's where compression can assist you.
In this article, you will learn about video compression and how it works, as well as its various applications overall and in the iOS ecosystem in particular. You'll also get to know the ways to use compression most efficiently to get a result that is both good-looking and not too large in size.
Introduction to video compression
Video compression is the process of reducing the size of a video file by removing redundant or unnoticeable details. This allows you to save disk space and speed up data transfer.
Basically, file compression is divided into two main types:
- Lossy – strong compression (for example, H.264, HEVC); some data is lost, but the quality remains acceptable.
- Lossless – minimal compression without loss of video quality (rarely used for video due to its large size).
Of course, most of you would want your files to have the best quality, so you may wonder why you should compress them at all. And there are a few good reasons to do so. Let's check them out!
Benefits of reducing video size
If you're gonna compress videos, you can expect such pros as:
- Saving iPhone storage space: Without compression, 1 minute of 4K video requires tens of gigabytes (similar to 10 HD movies). Using compression formats like HEVC, the same 4K video consumes 2–5 times less space (about 100-200 MB per minute).
- Fast transfer over the Internet: Full HD video without compression can be gigabytes, so it might take hours to send. The same video in H.265 format is about 200–500 MB and can be sent in minutes. This way, you can quickly share videos on Telegram, WhatsApp, or iMessage and stay within their file size limits.
- Smooth streaming (YouTube, Netflix, TikTok): Platforms use compression to prevent video from buffering, even on weak Internet connections; for example, YouTube automatically lowers the bitrate for mobile users.
- Support for other devices; Some formats (like H.264) work even on devices from 10 years ago. iPhones automatically convert videos when sending them to unsupported gadgets, so you can shoot a video on an iPhone 15 Pro Max and open it on an Android 2014 without any problems.
However, there are also drawbacks worth noting:
- Quality decreases with strong compression (artifacts, blurriness).
- Not all codecs are supported everywhere (for example, HEVC may not open on Windows without additional software). Recent Windows 10 and 11 updates added optional HEVC support through Microsoft Store extensions, so you might need to install these for proper playback.
- Professional formats require a lot of space and power.
Which format best fits your needs? Let's review their features so you can decide!
Video compression on iPhone
When you record or share videos on your iPhone, the videos are saved in specific formats that affect their quality, file size, and compatibility with other devices or apps.
Different formats balance video quality and file size in various ways. For most of us, the important thing is to have videos that look good, don't take up too much space, and can be easily shared or played on other devices.
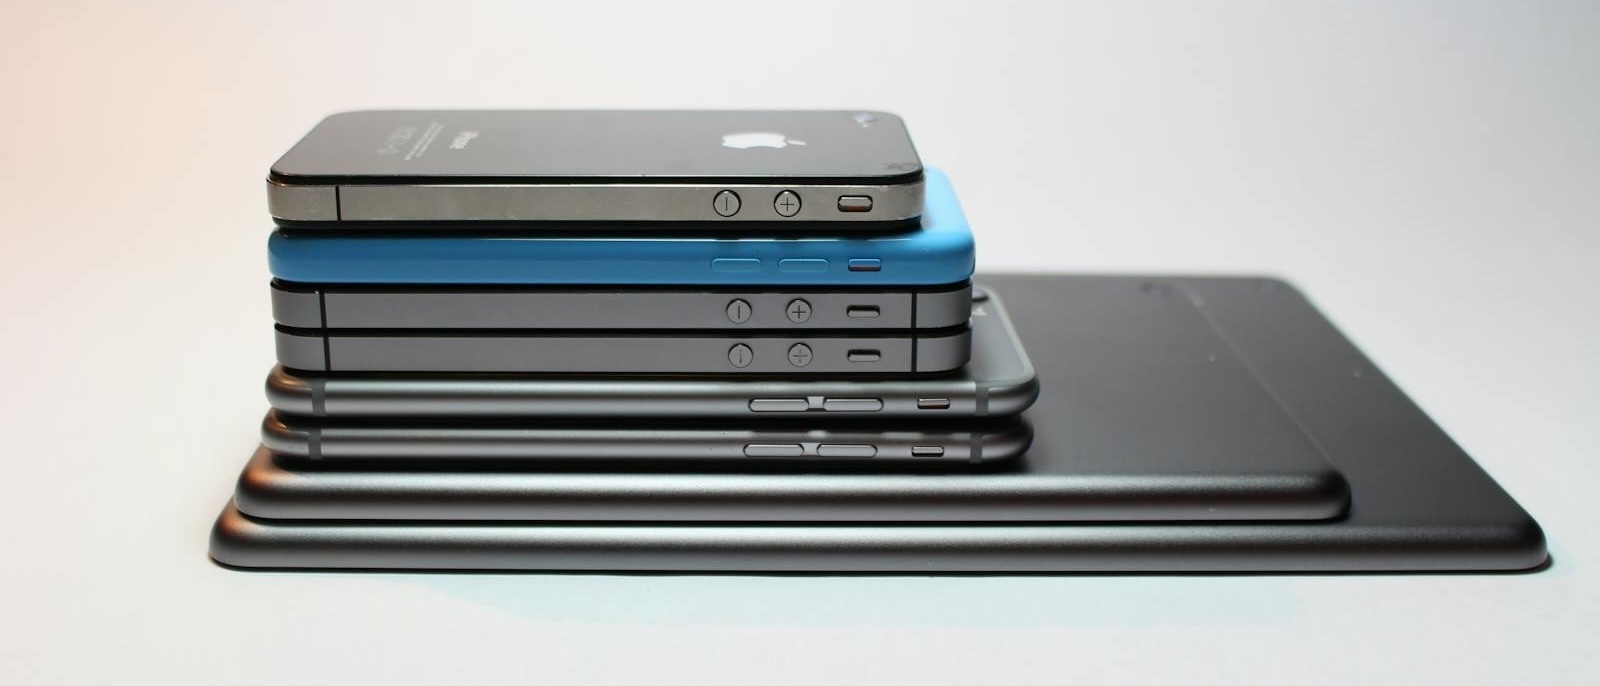
Your iPhone offers two main settings for video formats (Settings > Camera > Formats) that you can easily manage without needing technical knowledge:
- High Efficiency: This setting uses a modern compression method that reduces file size while keeping good video quality. It's great for saving storage space on your device and works well for most uses. This setting uses the HEVC (H.265) format.
- Most Compatible: This option uses an older, more widely supported format. Videos recorded with this setting tend to be larger in file size but are easier to share with older devices or apps that might not support the newer compression method. This setting uses the H.264 format.
Some newer pro versions of iPhones offer advanced formats like ProRes or ProRaw, designed for professional video editing. However, these formats create very large files and need a lot of storage space, so they are generally not necessary for everyday video recording or sharing.
In general, you don't need to worry too much about video compression. Your iPhone's default settings are designed to give you a balance of quality and file size.
How to compress videos on iPhone
If you want to make your iPhone video files as small as possible, there are several convenient options available to compress videos without losing critical quality. Here are some of the best methods you can use:
Built-in camera settings (before recording)
Accessible through Settings > Camera > Recording formats. Choose between high efficiency (HEVC/H.265) or highest compatibility (H.264). Remember that not all devices support the H.265, while the H.264 can increase the size but will work everywhere.
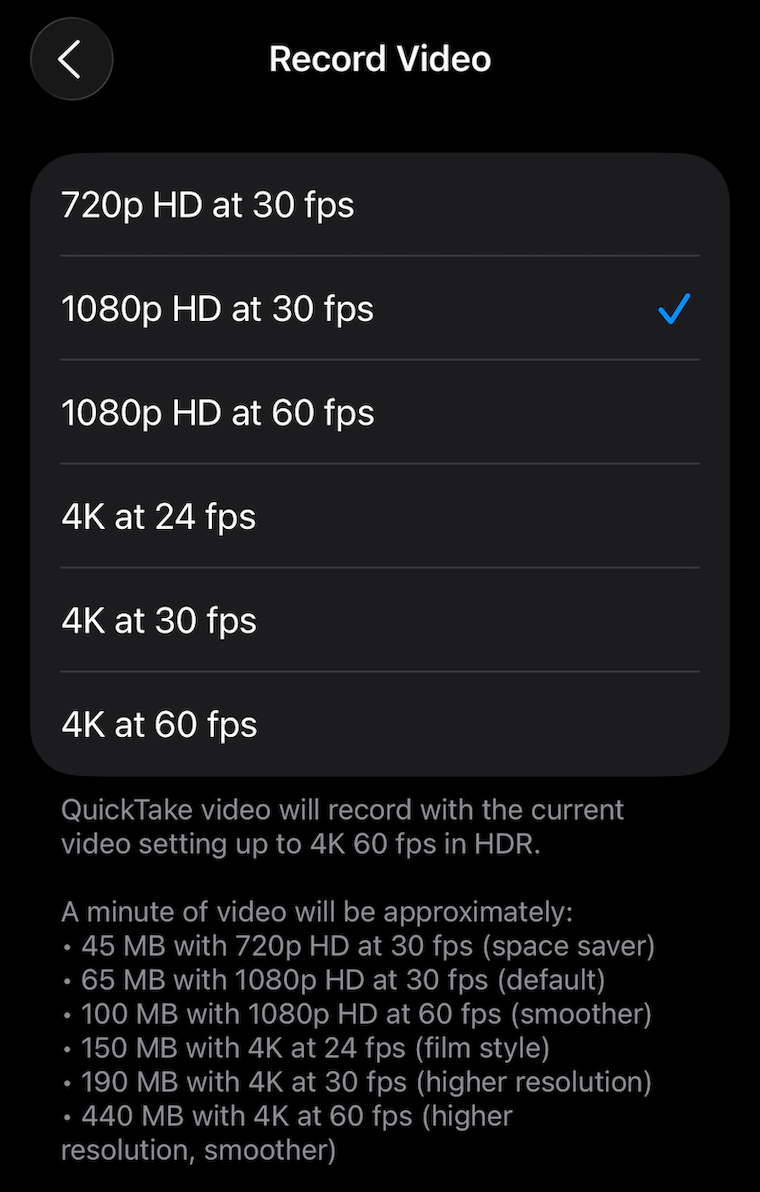
Also, you can change the resolution before recording via Settings > Record video > 720p/1080p/4K. So choose a lower resolution if you want to reduce the file size.
Reduce file size via Photos app (after recording)
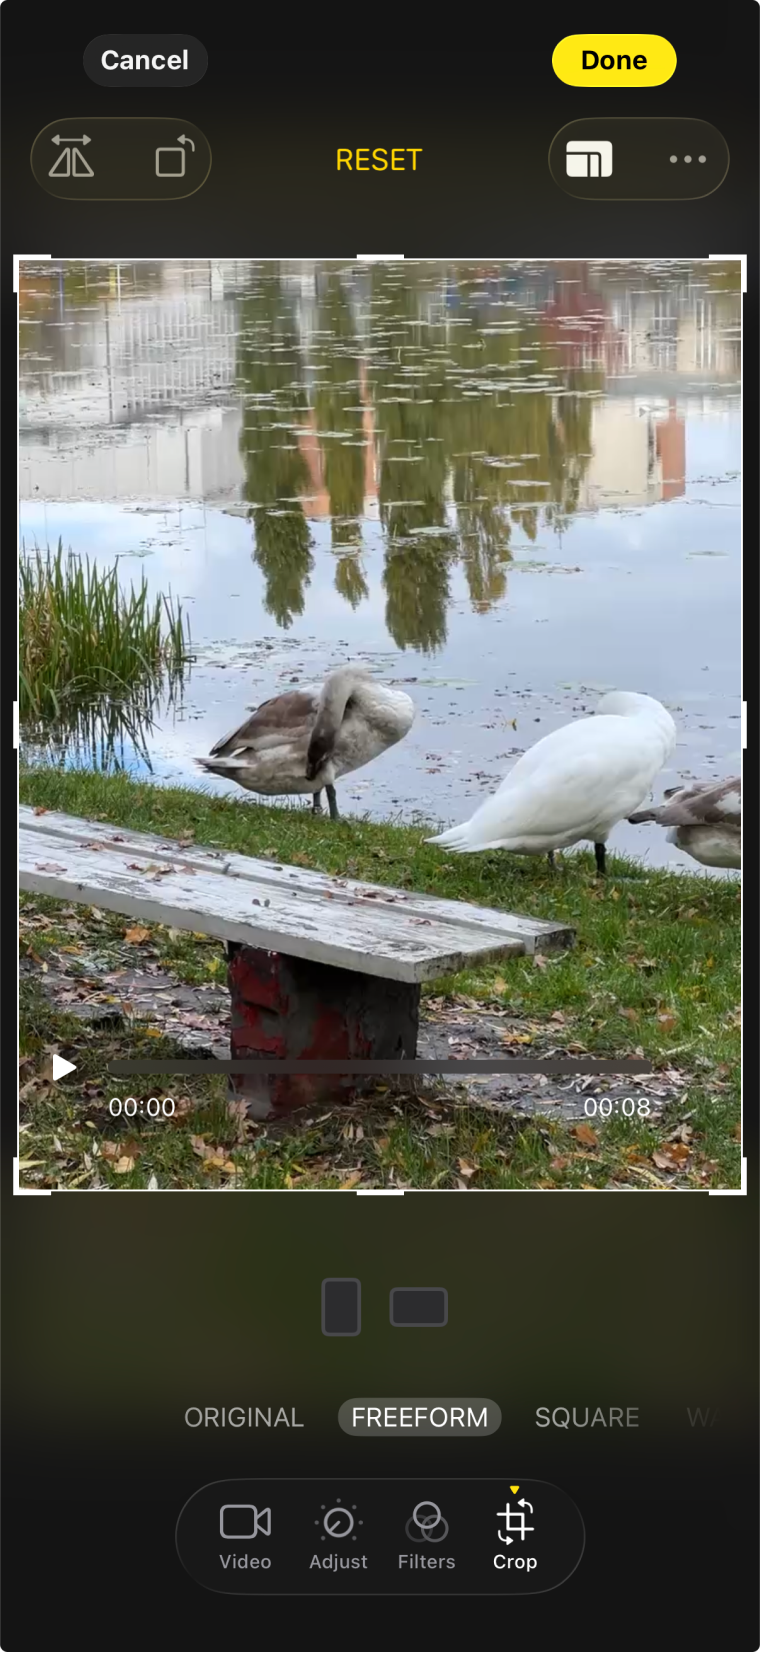
Open your video in the Photos app, tap Edit, and you can either trim the length by cutting the start or end, or crop the frame size (for example, changing from 16:9 to 4:3). When done, tap Done and save as a new video. This method reduces file size by shortening the duration or adjusting the frame dimensions, but does not change the resolution, so a 4K video remains 4K. Compressed videos still hold their playback speed settings, meaning they retain slow motion or time-lapse effects.
Compress video using Files app (after recording)
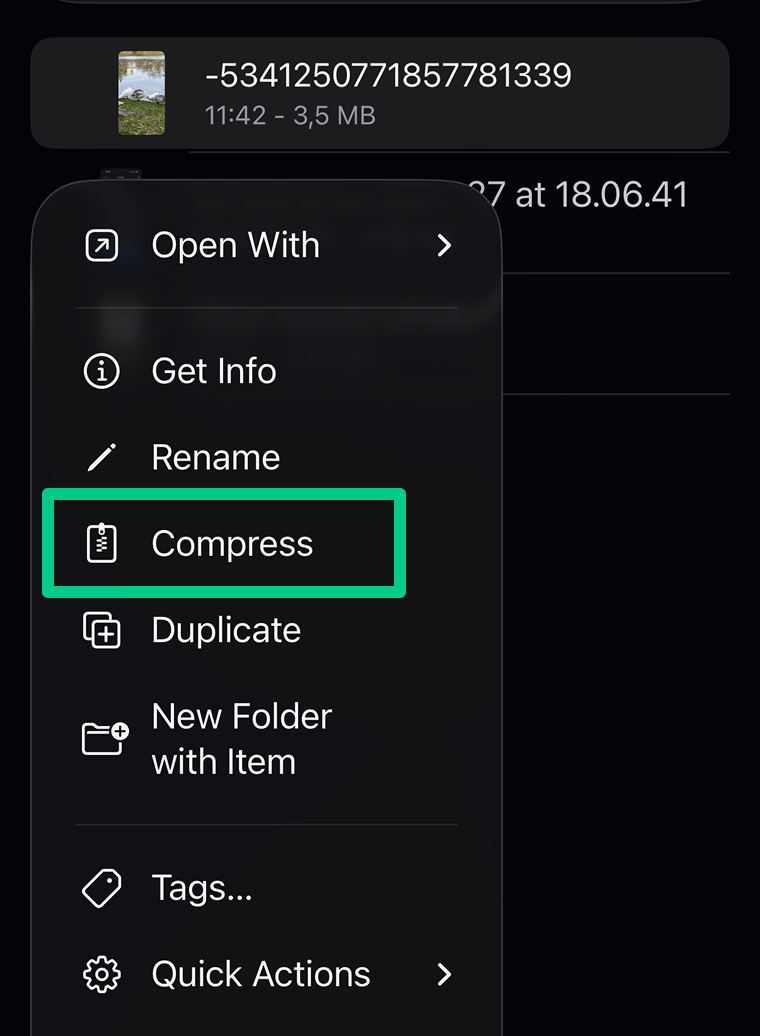
To quickly compress a large video for sending, save it from Photos to Files using Share > Save to Files. Then tap and hold the video file in Files, then choose Compress. This creates a .zip archive with a smaller file size, but the video format and resolution remain unchanged. This method is useful for sending videos and does not affect playback quality.
Export with iMovie (after recording)
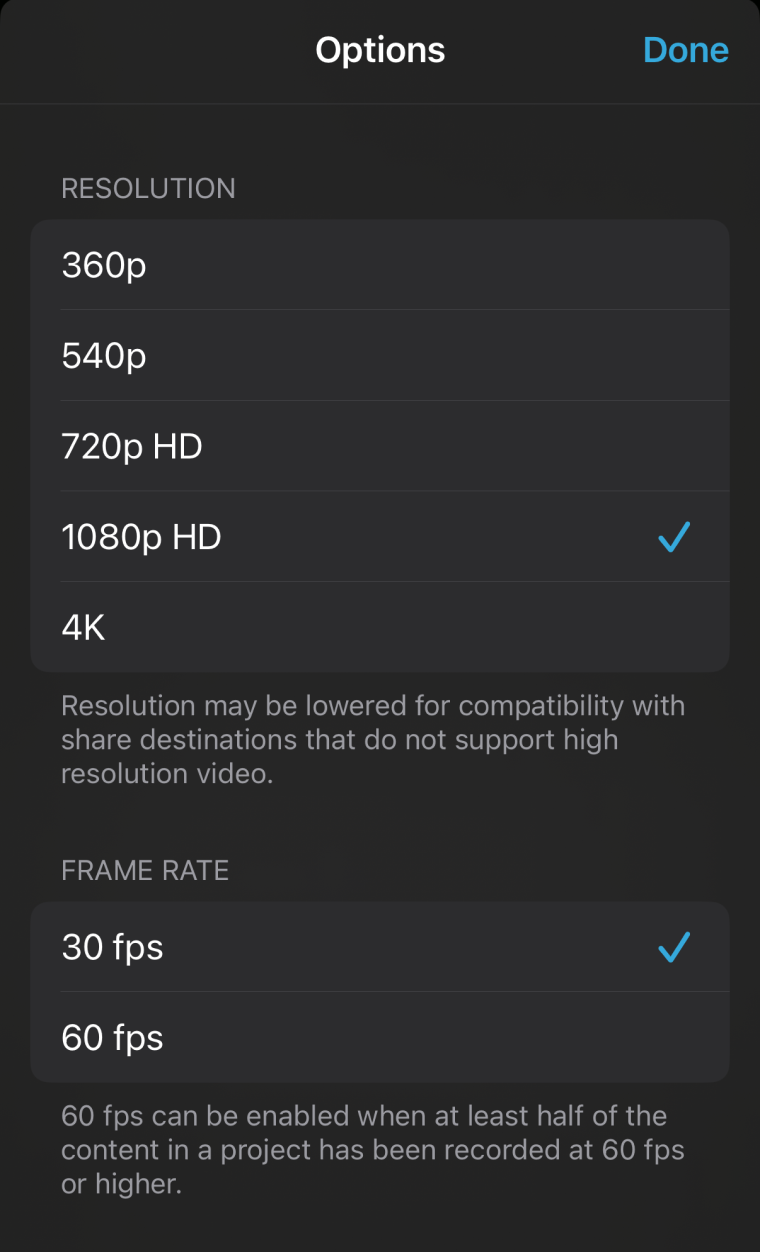
For more control, use iMovie to reduce video size. Open iMovie (download free from the App Store if needed), create a new project, and add your video. When exporting via Share > Save Video, you can select the output quality from options like 360p, 540p, 720p (HD), 1080p (Full HD), or 4K. Choosing a lower resolution produces a new video file with reduced file size and resolution, helping save space on your device. Additionally, users can choose to lower the quality level to achieve more compression when resizing videos.
Third-party compression apps
Since iPhones lack straightforward built-in compression features after recording, using third-party compression apps might help. Many video compression tools for iPhone allow you to reduce video file sizes without sacrificing quality. You can use a separate iOS app from Clideo that provides several compression presets for offline and online use. Follow these steps to reduce your video file size:
- Download and open the Clideo Video Compressor App: Find Clideo Video Compressor on the App Store, download, and launch it on your iPhone.
- Select your video: Tap the “+” button to browse your Photos library and choose the video you want to compress.
- Choose compression settings: After selecting your video, the app will suggest compression options automatically. Alternatively, you can opt for the Custom setting (which requires an Internet connection) to adjust the codec, resolution, file format, and compression quality according to your preferences.
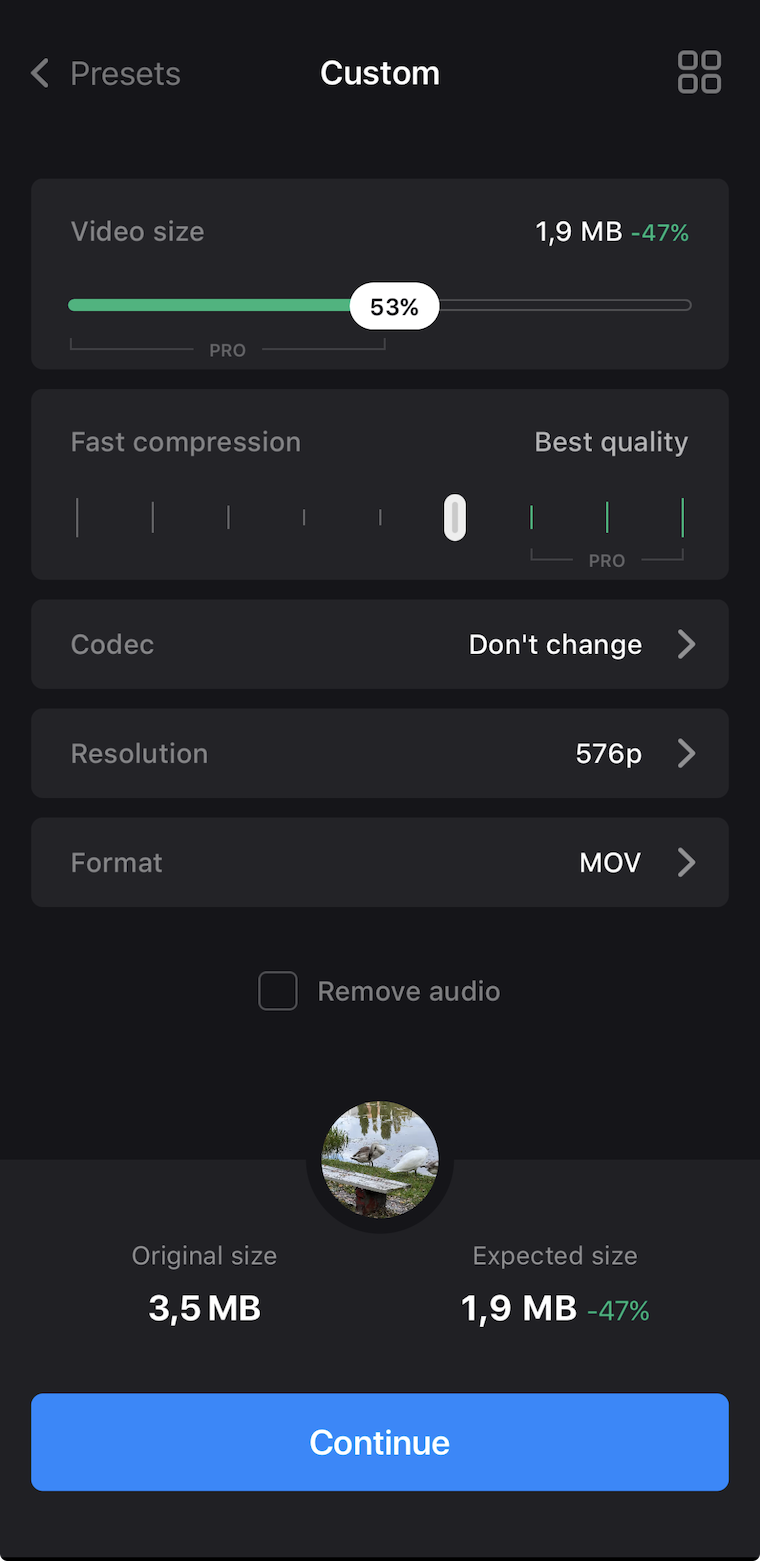
- Start compression: Tap the "Continue" button to begin processing your video. The app will optimize the file size while maintaining as much of the original quality as possible.
- Save or share your video: Once the compression is complete, preview the compressed video. It can find the compressed version in your your Photos or you can share it directly via messaging apps, email, or social media.
As you can see, Clideo's iOS app enables quick video compression, making it easier for iPhone users to manage their device's storage and share videos rapidly. Note that the free version includes a small Clideo watermark, and you can compress files up to 500 MB at no cost.
Online video compression
Nowadays, the compression process has become even simpler; you can do it using many online tools without downloading any software or apps. The main advantage of online video compressors is that they are convenient for those who need to compress videos quickly and easily, without installing anything on their device.
Let's see how you can compress a video using another Clideo solution for compression that supports various formats, as well as less common ones, and compresses videos while maintaining their quality as much as possible. Like most online video compressors, it supports multiple video formats such as MP4, 3GP, and MOV. You can make a video smaller on both your iPhone and Mac, as all you need is your browser.
Here's how you can compress your video with Clideo in just a few easy steps on Mac:
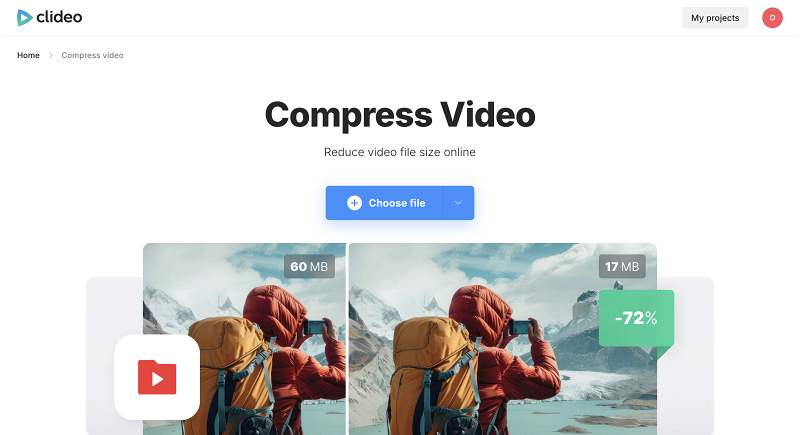
- Upload your file: Visit Clideo's Video Compressor website and click on the "Choose file" button to upload the video you want to compress. You can also upload videos directly from your device, Google Drive, or Dropbox.
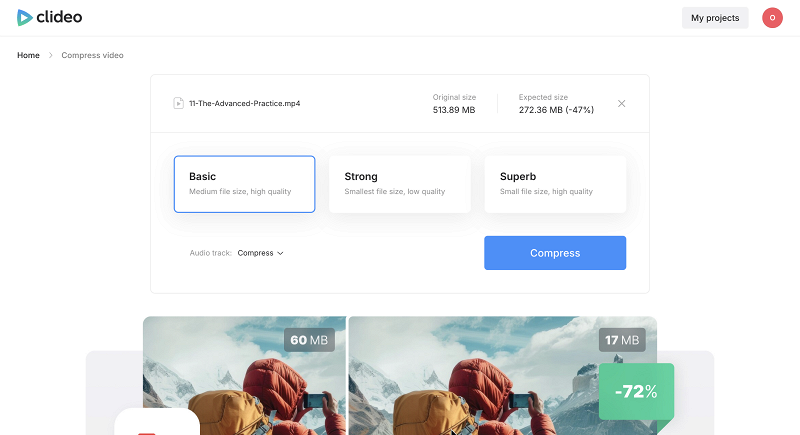
- Select the preset: Choose the preset that best suits your needs (Basic, Strong, or Superb). You will see an estimated compression rate and the file's output size after compression.
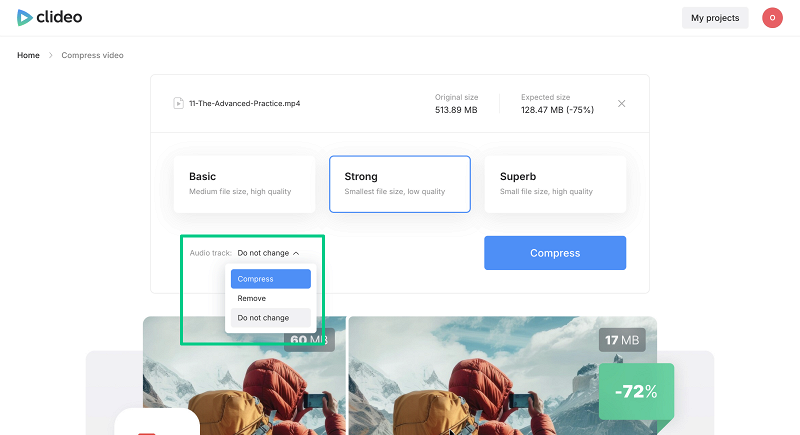
- Remove audio (optional): If you only need the video without sound, remove the audio to further reduce the file size. Premium users will also have an option to compress the audio track.
- Compress video: Click the "Compress" button to start compressing your video.
- Preview the video: After the procedure is over, take a look at the compressed video to make sure it meets your expectations.
- Download or save to cloud storage: If everything is fine, download the compressed video to your device, or save it directly to your cloud storage.
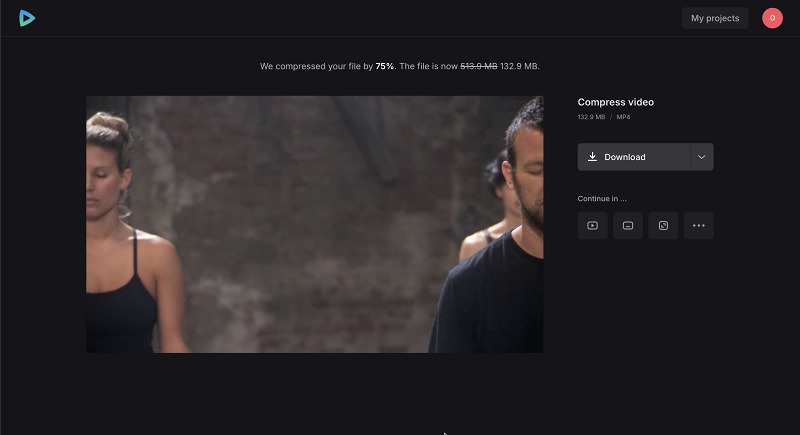
As you can see, this online tool is user-friendly, as it doesn't require any software installation and has just enough settings to make it a convenient option for everyone looking to compress videos quickly and efficiently. For a more detailed step-by-step guide that'll walk you through the whole video compression process, check out this help article about compressing video in a browser.
Like many other tools, Clideo adds a watermark to compressed videos in its free version and also has a limit of 500 MB. To compress large video files without a watermark, you need to upgrade to a paid plan. Additionally, the subscriptions for the Clideo app and Clideo online compressor are separate. Test both tools and compress shorter videos to determine which one works best for your needs and whether you should make a purchase.
Tips for video compression
Oftentimes, one-tap compression isn't enough because the perfect result requires more. So let's see what can help you achieve it more easily.
- First, try to always use HEVC (H.265); it's easily the best format out of the available ones, as it saves up to 50% of space without losing quality. Otherwise, select the format and compression settings based on the intended use of the video, such as sharing on social media or emailing to friends and family.
- If it’s possible within settings, reduce the frame rate for static scenes. Generally, 24/30 FPS is enough; anything higher is only needed for dynamic shots, so it's an easy way to reduce file size.
- Trim unwanted parts right away. Removing them will reduce video file size, making sending or editing easier.
- Use 1080p instead of 4K for social networks. 4K in Instagram/TikTok will still be compressed to 1080p, but it will take up more space and time to load.
- Use a video compressor app that offers high-quality compression settings and formats to avoid losing quality.
We also need to remember what not to do to not screw up the result.
- For example, overly compressing videos, like choosing the minimum size (480p or low bitrate), leads to artifacts, blur, and "blocks" appearing. To avoid it, use a bitrate of at least 5-8 Mbps for 1080p.
- Additionally, be careful not to choose the wrong format or compression settings for the intended use of the video, as this can result in compatibility issues or poor quality.
- Also, avoid double compression, i.e., cases when you compress the video, then the social media platform (e.g., Instagram) compresses it again. Upload videos in the highest quality the platform allows, and use the original resolution if the platform supports it.
- Avoid cropping videos after compression, as it can result in loss of detail or sharpness. First, trim the video, then compress the final version.
- And don't ignore audio; with strong compression, it turns into "metallic" noise. To prevent it, in the compression settings, select an audio bitrate of at least 128 kbps and use the AAC codec (standard for quality/size balance).
- It's also important to test the compressed video before sharing or uploading to ensure that it meets the desired quality and format.
Future of video compression
The future of video compression looks very promising and will likely be determined by several key trends.
First of all, these are, of course, new codecs that are more efficient than HEVC. For example, there is already VVC (H.266), the successor to HEVC, which compresses 40-50% better than H.265. But it requires powerful processors, which are still expensive for smartphones.
AI compression will also advance in terms of quality. Even current neural networks analyze content and compress videos "smarter". For example, they preserve important details (faces and text) while blurring the background slightly. AI upscaling will also be more helpful in restoring detail after compression.
Immediate cloud compression. Platforms like TikTok and Instagram will compress video in real-time to suit your Internet connection, making local compression less important.
And, of course, the reason to be excited: compression will become "invisible" – we will no longer notice the difference between the original and the compressed video. Technologies like ML-based encoding (from Intel, AMD) will make visual artifacts almost invisible, even with strong compression.
Video compression reduces video file size by removing redundant data and simplifying details, minimizing quality loss.
You can either use built-in camera settings to record in HEVC or at a lower resolution, or use third-party apps and online tools to compress existing videos.
The best apps function offline and offer customizable compression settings, providing greater control over the final output. The Clideo Video Compressor app offers both features.
If there is an option to change the codec, select HEVC (H.265) for the best quality-to-size ratio; you can also adjust resolution.
VLC Media Player is a free tool that includes this feature. Keep in mind that batch video conversion can demand significant resources, so ensure your system has enough memory and processing power.
Compression is smart technology: files become lighter without sacrificing quality. iPhone handles this "behind the scenes," so you can conveniently shoot and share videos without issues. However, various video compressor apps available for iPhone offer additional powerful features and compression settings to compress videos more efficiently. By finding the right tool and avoiding common mistakes, you can achieve the best results when compressing videos and ensure the final video meets your desired quality and format.


