How to Enhance Voice in Videos
Audio is a key aspect of video, especially when it comes to voice recording. Learn how to enhance voice in video by reducing background noise, then add subtitles to help viewers follow along.

Voice clarity is important for a lot of videos – whether it's instructions, gameplay, or interviews on any topic. It's always more enjoyable to listen to clear and understandable audio. Viewers can tolerate bad visuals but not bad audio. If you want to enhance voice in video, this guide will help you find out what could be getting in the way, how to reduce noise in Clideo and make your video even more accessible.
What makes a voice hard to hear in a video
Not everyone has good microphones, even though the ones built into modern devices are getting better. In addition, there is the other side to the problem when the microphone is so sensitive that it picks up other noise, or the person is in a slightly noisy place when recording.
Then, how to enhance your voice in a video file? Typically, the easiest way is to remove unwanted noise, especially if everything else sounds fine. There are many apps and programs that can be used to adjust various aspects of the sound and reduce noise levels to fix the issue.
Before editing, listen to a short part where someone is speaking. The words may be difficult to hear for different reasons:
- Background noise. A fan, wind, or other video sounds can distract from the voice. Noise reduction can help make speech clearer.
- Low volume. A quiet recording can be difficult to follow even without background noise. If the recording is quiet but otherwise clear, adjusting its volume may be enough.
- Loud background music. A soundtrack can cover the words even when the voice recording itself sounds fine.
- Echo or distortion. A voice that sounds distant, harsh, or crackly may need more than noise reduction.
If background noise is the main problem, continue reading to find out how to make a few adjustments using Clideo to make the voice in a video easier to hear.
How to enhance voice in a video with Clideo
If you are looking for a suitable way to enhance your voice recording by reducing noises like a fan, wind, or air conditioner, try our online editor! With this tool, you can not only reduce background noise in your video with one click, but also improve its visuals and even add subtitles for better accessibility.
-
Upload a video
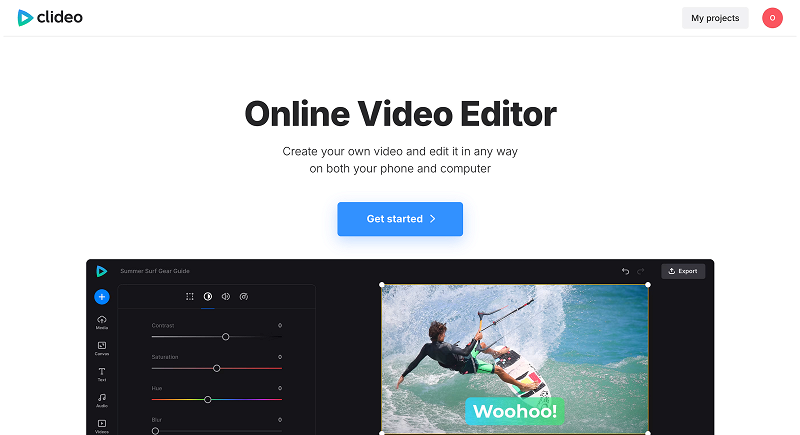
Open Clideo's Online Video Editor and click Get started.
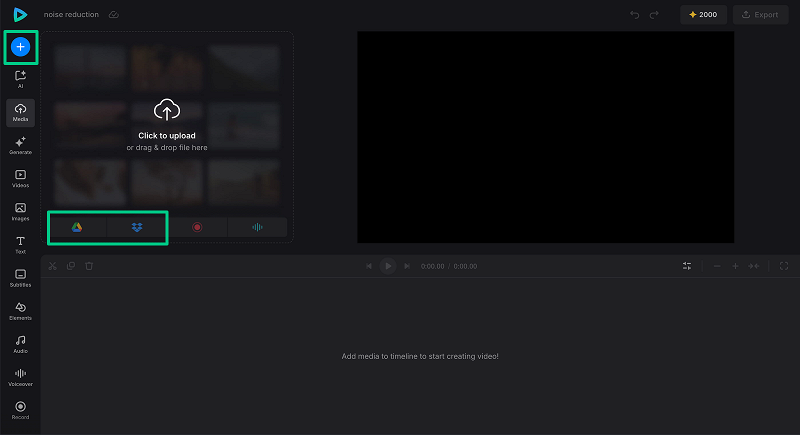
Then hit + to upload the clip from your device, choose a cloud storage account if your file is there or just drag and drop the file into the editor.
-
Remove background noise from the audio
After the video is uploaded, it will immediately appear on the timeline. Select it, then in the options tab that appears, open the Audio tab and click the toggle switch to activate the Noise reduction function. Play the video to hear how the voice sounds now.
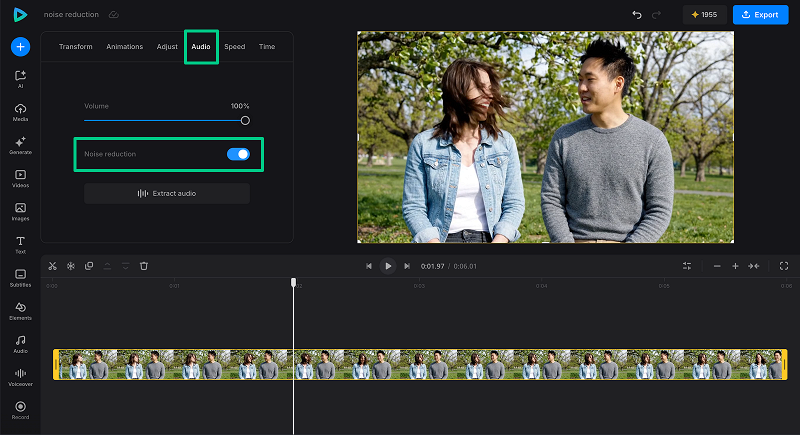
Listen to both a quiet part and a part with more background noise. Turn the switch off and on to compare them. The aim is to make the words easier to understand while keeping the voice sounding natural.
If needed, you can separate the audio track in case you want to edit video and audio separately from each other and apply the fade-in and fade-out effects to the audio.
-
Check and adjust the sound
If the voice is too loud, select the video or audio element, open the Audio tab, and lower the volume using the slider. Make a small change, then play the clip again.
If you have added music on a separate track, select that track and lower its volume until the words are easy to follow.
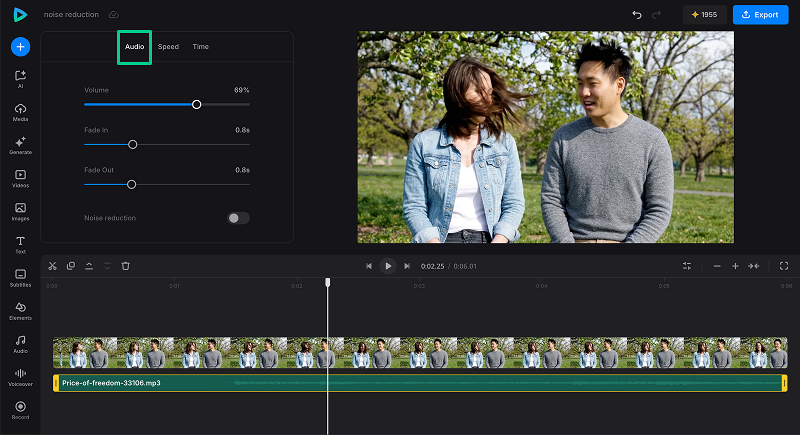
Before exporting, play the parts where the voice is quietest or the music is loudest. If possible, also listen through speakers rather than relying only on headphones.
-
Add subtitles if needed
Even when the voice sounds clearer, subtitles can help your audience follow the words if they are watching in a noisy place or with the sound turned down. Clideo offers an AI-powered subtitle generation feature in the same tool.
Click Subtitles in the sidebar and choose Auto subtitles. If the project has several elements with audio, choose the whole project or the clip you want to transcribe. Click Generate to automatically create the subtitles. Automatic generation is available to registered users and uses credits.
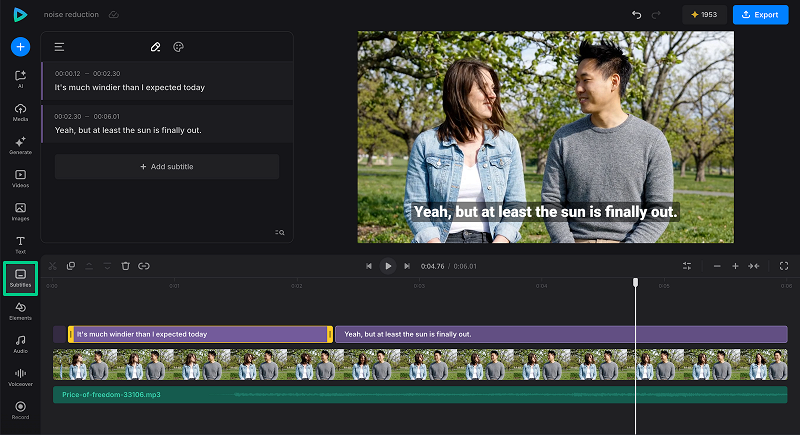
Read through the subtitles, correct any words that were misheard, and check that the timing matches the speech. You can also adjust their style and position so they are easy to read. The subtitles will be part of the exported video. You can also download them as a separate subtitle file. For more details, see our guide to subtitles in Video Editor.
-
Export and download the result
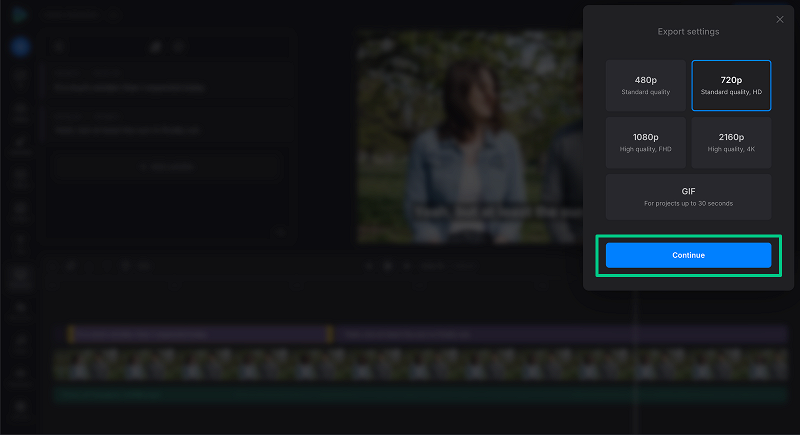
After you finish editing, click Export at the top right and pick your preferred output option.
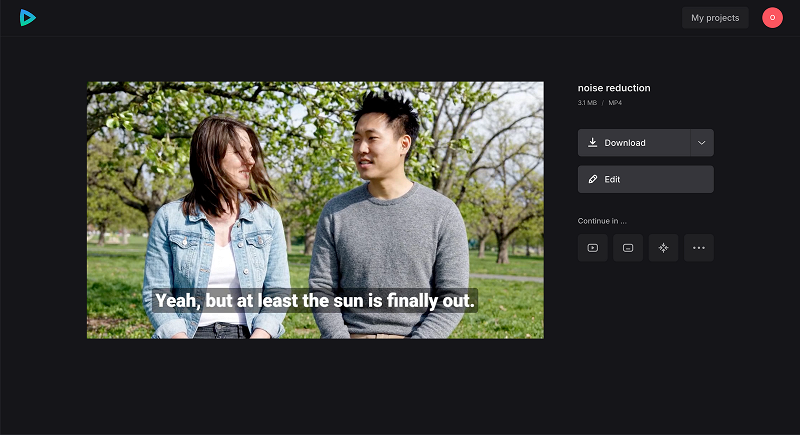
When the video is exported, you can watch the preview to see how it looks after editing. Listen to the audio as well. If you like the result, click Download to save it back to your device or cloud storage.
Tips for clearer voice recordings and better audio quality
You can actually start enhancing audio before recording the footage to save time later. You don't need a professional studio – first, check the place and equipment you already have.
- Choose a quieter place. Close a window or move away from a noisy appliance when possible.
- Check the microphone position. Keep it close enough to pick up your voice clearly, without rubbing against clothes or getting in the way.
- Listen for room echo. If your voice sounds distant in an empty room, try a different spot with more soft furnishings.
- Make a short test recording. Speak as you would in the video and listen back before recording the whole thing.
If you are making a voiceover separately, see how to record audio for a video. This also gives you a chance to try another take without filming the scene again.


