Image to GIF: How to Animate a Still Image with AI
GIF has been around since 1987. In internet years, that is practically ancient history. Yet it still turns up in our chats, emails, and how-to guides, quietly repeating the same few seconds while newer formats compete for attention.

We tend to think of GIF images as moving pictures: a reaction, a blinking cat, a tiny celebration in a group chat. But movement is only one of the things the format can do. And now, you don't even need several pictures to make it happen.
What is an animated GIF?
GIF stands for Graphics Interchange Format. A GIF file can hold a single still image, much like a JPG or PNG, or several images that appear one after another. In an animated GIF, those images act as frames. Small changes from frame to frame create the impression of movement, like the drawings in a flipbook.
The timing determines how long each frame stays on screen. Play the sequence on repeat, and you have the familiar animation that keeps going until you scroll away. There is no audio: the suspicious squint has to speak for itself.

That makes the format useful for more than reactions. A few frames can show where to click, reveal a before-and-after edit, or demonstrate a small change without asking someone to watch a full video. Our guide to what a GIF is and how to use it explores the format in more detail.
Its age does come with a few limitations. Each frame can use up to 256 colors, so a detailed photograph or a smooth gradient may look different after conversion. Animated GIFs can also produce surprisingly large files. Short and silent doesn't necessarily mean small; we'll keep that in mind when preparing our animation.
How does image-to-GIF conversion work?
For a long time, making your own animated GIF often meant preparing a series of pictures and assembling them in an image editor such as Photoshop or GIMP. You arranged layers or frames, adjusted their timing, previewed the sequence, and exported it. A tiny animation could involve quite a lot of clicking.
That frame-by-frame approach is still useful when you want control over every change. You can also assemble existing photos, video clips, text, and animated elements in an online editor, as in our Halloween GIF tutorial. No need to learn a desktop image editor just to make a pumpkin blink.
But what if you only have one picture and want movement inside it? Saving that JPG or PNG as a GIF won't make the subject move. The missing frames still have to come from somewhere.
This is where AI image animation offers another route. You provide a picture and describe what should move. The model generates a short video, creating the frames between the starting image and the resulting action. You can then trim the clip and export it as a GIF file.
And there is a tool that allows you to generate an animated image from a single shot, edit it, and save it as an animated GIF – Clideo's Video Editor, which includes an AI generator and editor in one simple online workspace.
So let's try it with a picture of a cup of coffee. We'll ask the AI to animate the steam while the cup and camera stay still, then save the result as a looping GIF. If you already have several pictures, we'll also cover how to combine them without AI.
How to make an animated GIF in Clideo's GIF maker
For this example, we'll animate steam above a cup of coffee while keeping the rest of the scene still. You can use your own photos or illustrations and adapt the prompt to suit your creative idea. This image to GIF tutorial runs in your web browser, so there are no desktop tools to install.
Choose a clear image with an easily recognizable subject, and use a picture you have permission to upload and animate. AI generation requires a registered account and uses credits. Check the cost shown before starting a generation: the available settings and credit usage depend on the selected model.
-
Open the video generator in Clideo's GIF maker
Open Clideo's GIF maker and editor in your browser and start a project.
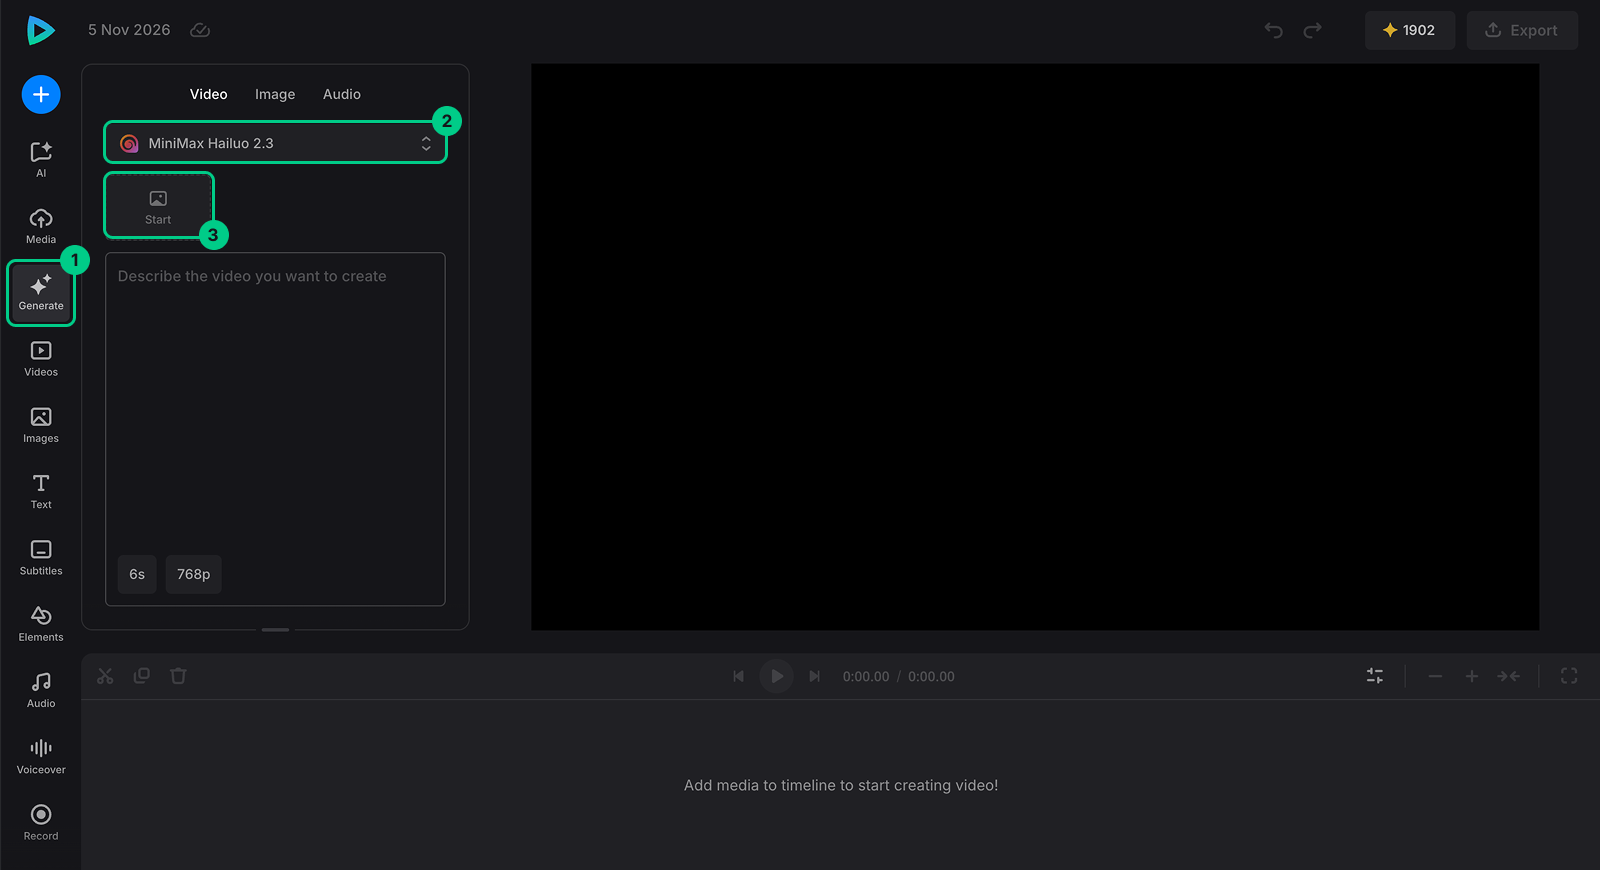
Click the Generate button and open the Video tab. Select a model that supports an image as an input. Review the models and their input fields before continuing. You need an option to add a starting or reference image, rather than a model that generates video from text alone.
-
Add the still image you want to animate
Upload your photo in the model's image input field. For our example, use a photo with a clearly visible cup and some space above it for the steam.
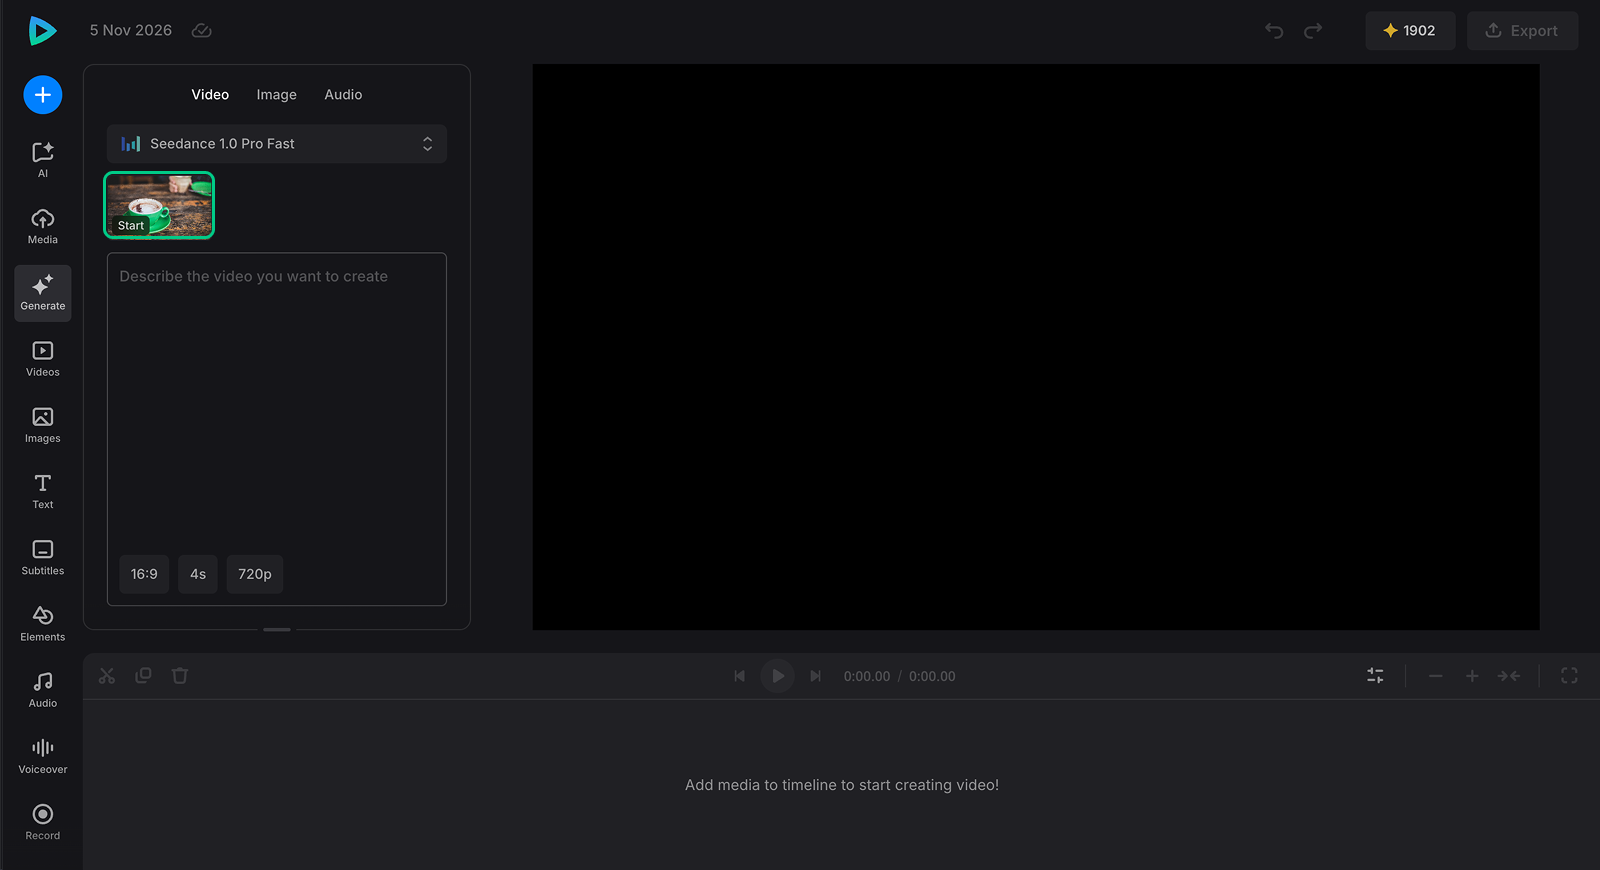
If you want to change the picture itself before animating it, you can first edit the photo with AI. For example, you might change its setting or lighting. Review that new image before using it as the starting point for your animation (you might need to download and reupload this AI-edited image as a reference image again).
-
Describe what should move
Write a description of the movement in the prompt field. Tell the model what to animate and what to keep still. Start with one simple movement; a small GIF doesn't need an entire action scene squeezed into a coffee break.
For example:
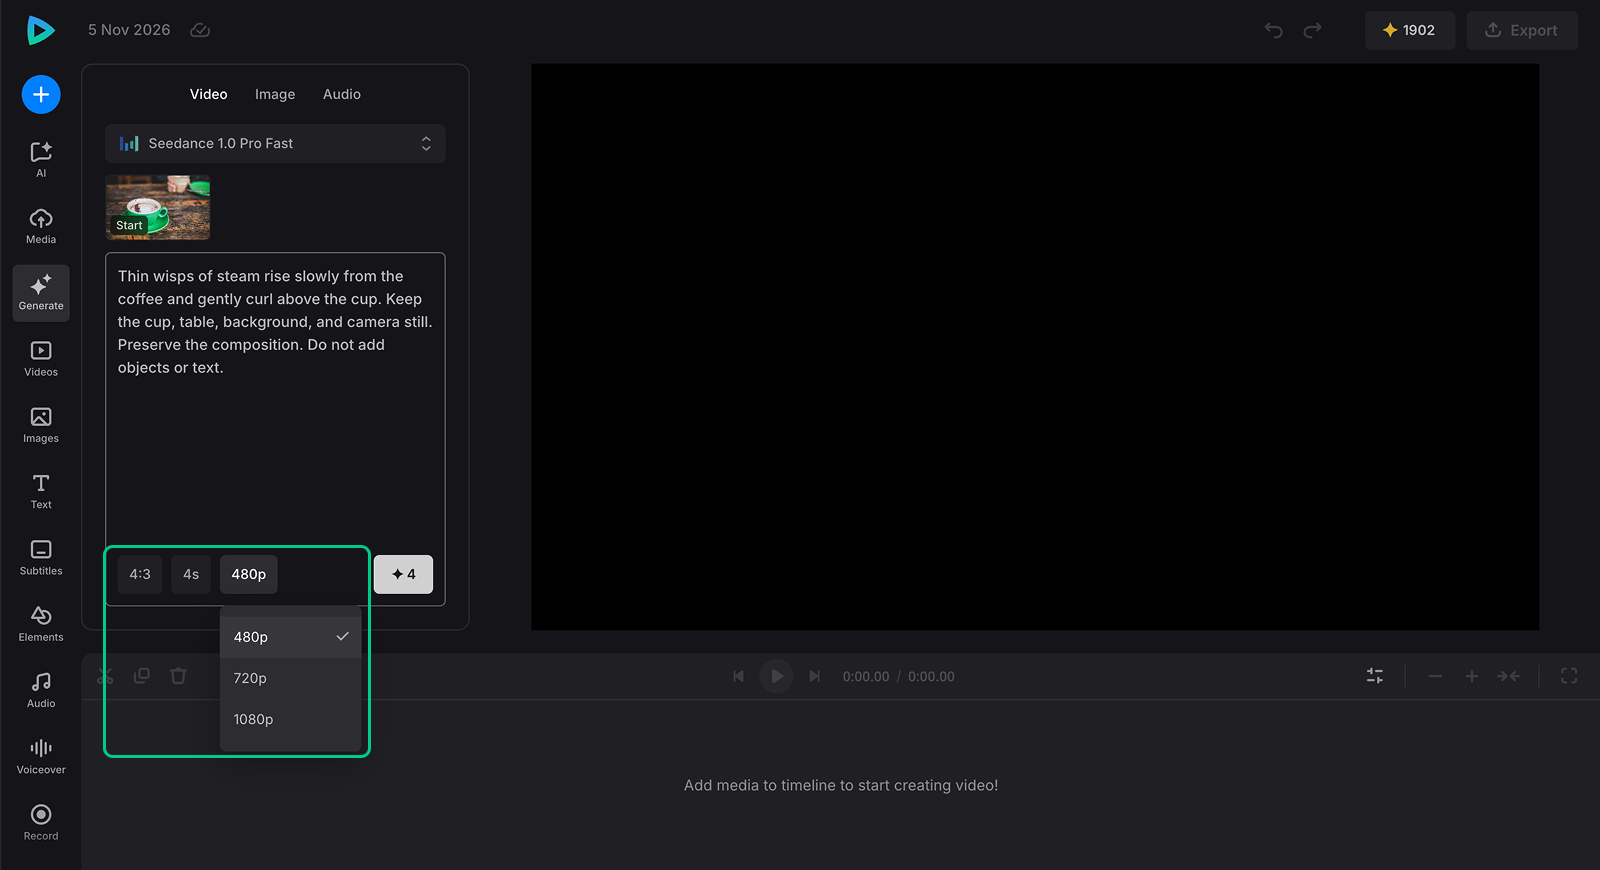
Thin wisps of steam rise slowly from the coffee and gently curl above the cup. Keep the cup, table, background, other objects and camera still. Preserve the composition. Do not add objects or text.
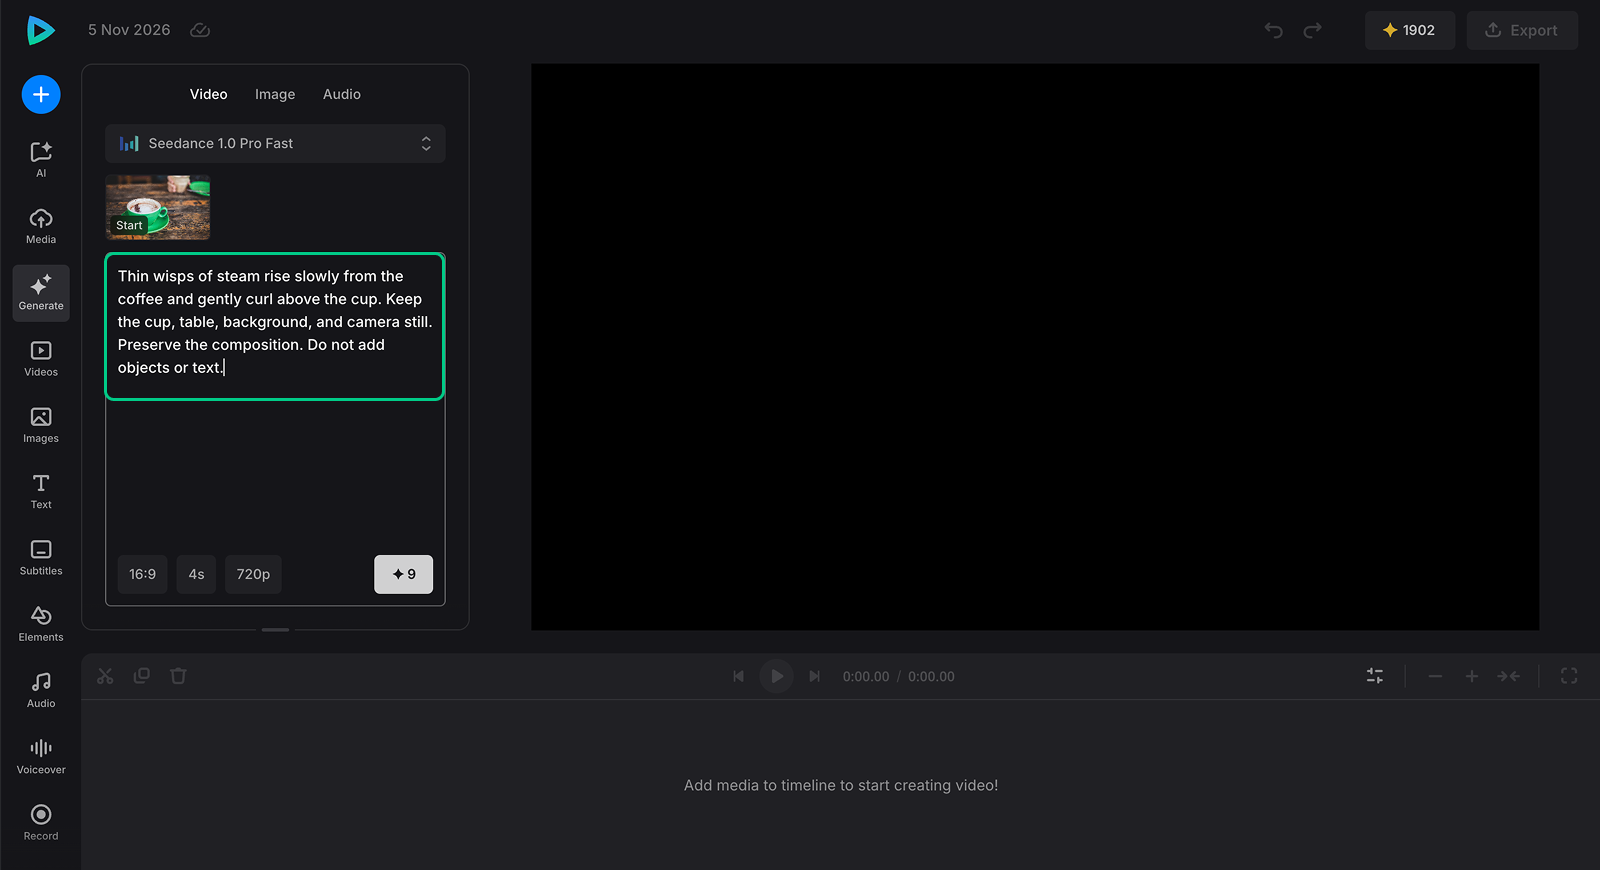
This gives the model a subject, a movement, and limits. A request such as "animate this picture" leaves all three decisions to the AI.
If the model offers duration, aspect ratio, resolution, or other settings, choose the options that fit your image and intended result. Keep the aspect ratio close to the source if you want to preserve its framing. Use the available duration control rather than relying on a number in the prompt to set the clip length.
-
Generate and review the animation
Start the generation and wait for the result. Play the whole clip, paying attention to both the moving area and the parts that should remain still.
In our coffee example, check whether the steam moves naturally, the cup keeps its shape, and the background stays put. With people or products, also inspect faces, hands, lettering, and logos. AI can change details even when you ask it to preserve them.
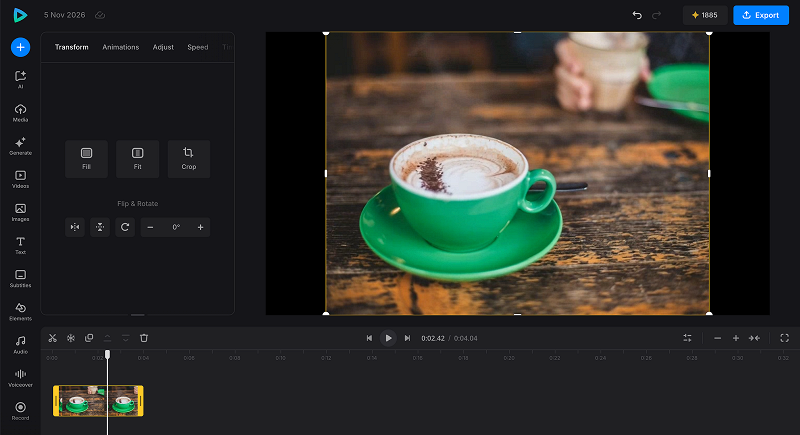
If the movement is too strong or something changes unexpectedly, simplify the prompt or describe the problem more precisely, then generate another version. Each new generation uses credits, and even repeating the same prompt may produce a different result.
Image animation is one part of AI video editing in Clideo. Here, we only need a short clip that will work well when repeated.
-
Edit the clip and add text (optional)
Add the generated video to the project timeline if it isn't there already. Play it again and trim any part you don't want in the GIF. A few seconds is a useful starting point, especially if the movement is subtle.
Keep only the elements you want to export. If you've also placed the original photo on the timeline for comparison, remove it from the final sequence unless you want it to appear in the GIF.
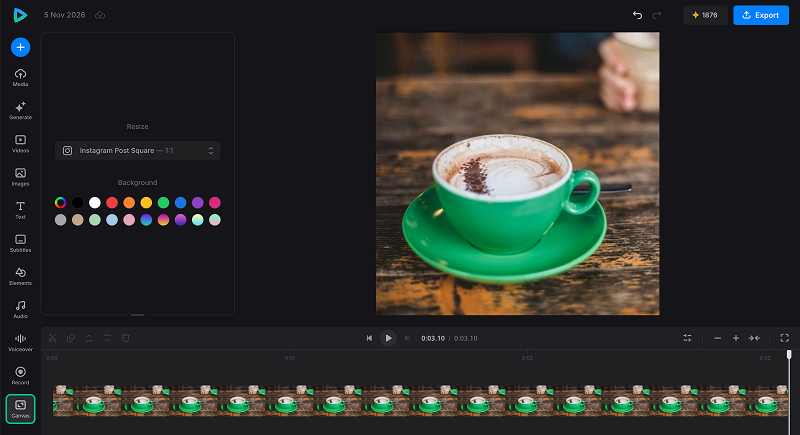
In Canvas, choose the aspect ratio that suits where you'll use the animation. Check the framing so the subject isn't accidentally cropped.
You can also add text, such as a short caption. Use a readable font and enough contrast with the background. Adding lettering in the editor keeps it separate from the AI-generated picture and lets you adjust it yourself.
-
Export the animation as a GIF
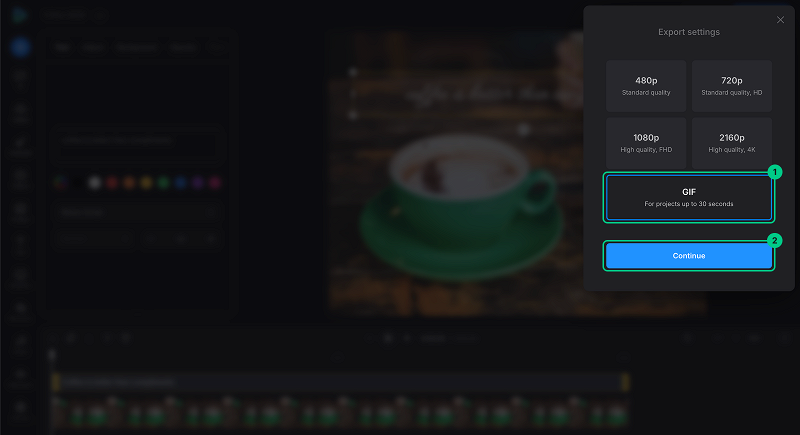
Make sure the project is no longer than 30 seconds. Click Export in the top-right corner and select GIF.
Clideo exports GIFs at 480p, without audio and with up to 256 colors.
Once processing is complete, download the output file to your device. Open your new GIF in a browser window and preview several repeats before sharing it. Check both the middle of the animation and the transition back to the beginning.
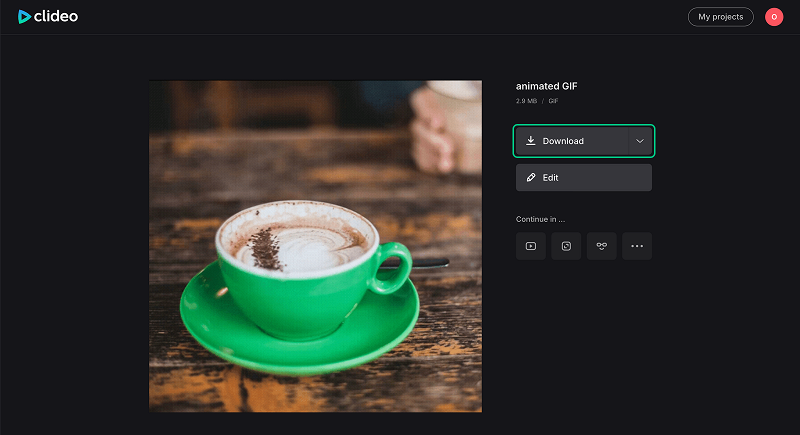
A looped file doesn't automatically have a seamless loop. If the last frame differs from the first, you'll see a jump when playback starts again. For our coffee example, a fixed camera and gentle steam give the scene less opportunity to change, but you still need to check the result.
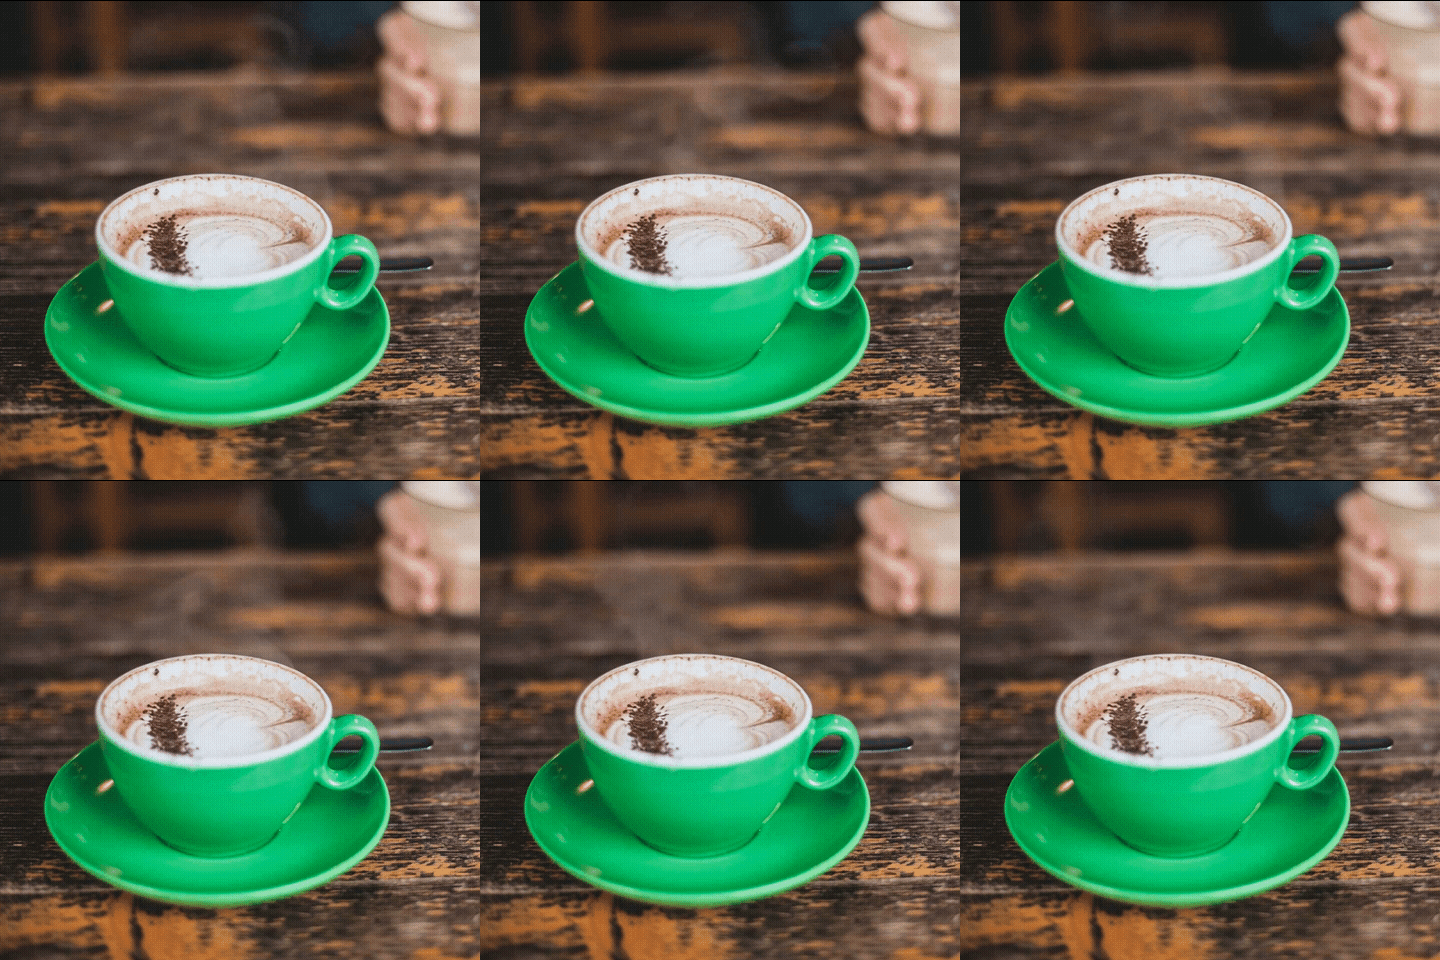
How to create a GIF from multiple images
Sometimes you already have all the movement you need, spread across several images: stages of a drawing, different expressions, or a before-and-after pair. You can combine those pictures without AI generation.
- Upload the images to Clideo Video Editor and add them to the timeline. You can drag and drop files from your computer into the editor window, then arrange the uploaded photos in sequence.
- Arrange them one after another in the order you want them to appear. Placing them on top of each other would create layers rather than a sequence.
- Adjust each image's duration. Give viewers enough time to read text or notice a change; use shorter durations for a quick sequence.
- Preview the whole project, keep its total duration within 30 seconds, and select Export → GIF.
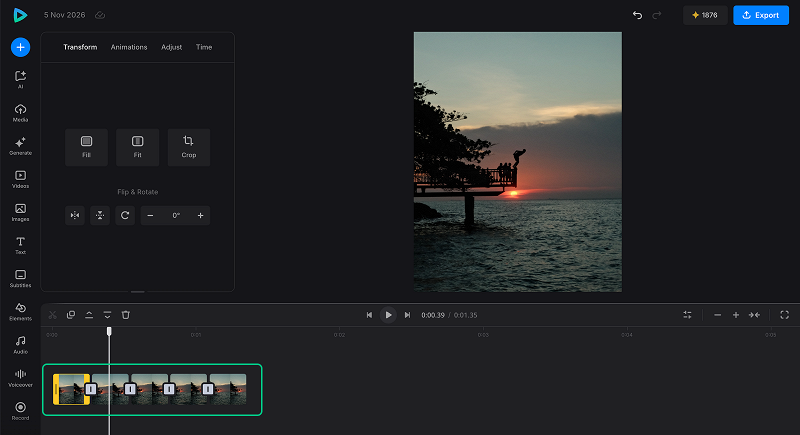
This approach changes which picture appears on screen; it doesn't generate new movement inside each photo. And there's a certain charm to the angularity that you get as a result, because it gives the animation a handmade, stop-motion feel.

Tips for a better-looking animated GIF
Before sharing your new GIF, check its movement, readability, and file size. These small adjustments help whether you use AI or assemble multiple images yourself.
Give the AI one clear task
If you are creating an animated GIF with AI, keep in mind that a moving subject, a changing background, and a sweeping camera all compete for attention. Start with the one movement that matters most. For a portrait, that might be a slight head turn; for a landscape, leaves moving while the camera stays still.
Describe the action you want to see rather than asking for a "stunning animation". Then compare the result with the source image: attractive movement is less useful if the product label has become unreadable.
Frame rate describes how many frames appear each second; playback speed describes how quickly the action unfolds. Both affect how movement looks. Here, focus on generating a clear action and trimming the clip rather than relying on a manual frame rate setting in the GIF converter.
Check the repeat before calling it finished
A slow zoom may look good on its first playback but jump abruptly when the GIF restarts. Watch the end-to-start transition (in Clideo just place two copies of the clip one after another and drag the playhead to see that transition in between). If it distracts from the animation, try trimming to a more suitable section or generating a version with less camera movement.
You can request a seamless loop in the prompt, but treat it as a request to evaluate, not a guaranteed output setting.
Help the GIF converter keep file size down
GIF files can be surprisingly large, even for short animations. So trim pauses and unnecessary footage, then check the downloaded file against the upload limit of the website or app where you plan to use it.
If you are using captions, keep them large and avoid relying on subtle gradients or tiny details. GIFs' limited palette can change the appearance of a photo, so judge the exported file as well as the video preview.
A GIF image can work well on a web page or in a message, but check how your destination displays animated files. If you plan to publish it on your own website, visit the page after uploading to confirm that the animation plays as expected.
For more ways to prepare an animation for sharing, see our guide to GIF optimization, including how source material, duration, and dimensions affect the result.